
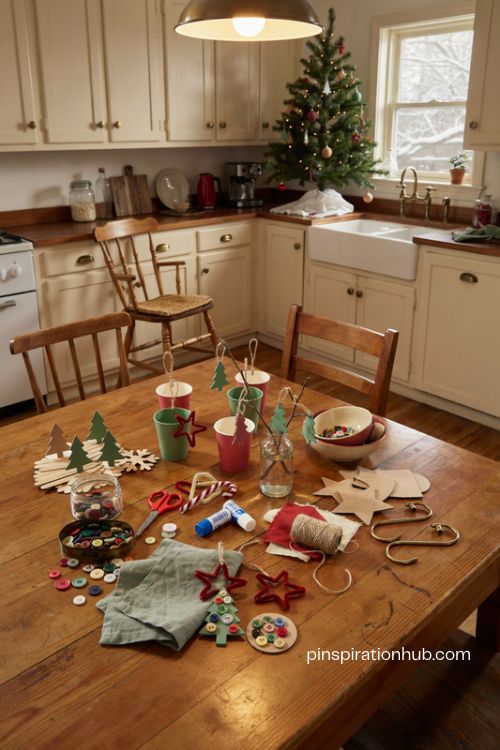
Finding a craft that actually holds a kid’s attention for more than five minutes is its own kind of holiday miracle. Half the ornament tutorials out there ask for supplies nobody has on hand, or steps too fussy for small hands to manage without a meltdown. The good news is that some of the best Christmas ornaments come from things already sitting in your junk drawer or recycling bin — popsicle sticks, paper cups, a handful of pipe cleaners. These are the projects that keep kids busy at the kitchen table on a snowy afternoon, and they end up as the ornaments everyone actually wants back on the tree year after year. Here are fifteen ornament crafts that are simple enough for little hands but still turn out looking genuinely charming.
1. Popsicle Stick Christmas Tree
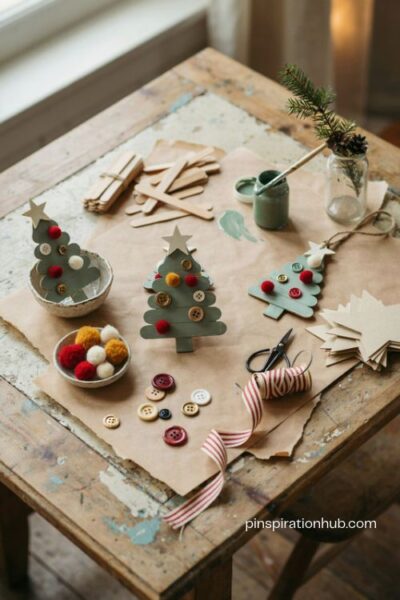
Three or four popsicle sticks and a bottle of green paint are really all you need to get started here. Line the sticks up largest to smallest, let each one dry, then glue them into a simple triangle shape once the paint has fully set. Small pom-poms or buttons glued on as ornaments give the tree some texture, and a tiny paper star at the top finishes it off nicely. Punch a small hole near the top of the topmost stick before gluing everything together — it’s much easier to thread a ribbon through while the pieces are still flat. This one works well for a whole group of kids at once since the supplies are so cheap to stock up on.
2. Handprint Reindeer Ornament

There’s something about a tiny handprint that makes this one hit differently than the rest of the list. Press a paint-covered palm onto sturdy cardstock, thumb pointing down to form the reindeer’s snout, then let it dry flat for a good hour before touching it again. Googly eyes and a small red pom-pom nose bring the shape to life, and a thin brown marker line can add a mouth if you want extra detail. Trim around the handprint shape once everything’s dry and glue a loop of ribbon to the back for hanging. Keep the paint on the thinner side so little fingers don’t smudge the print while pressing down.
3. Salt Dough Ornaments

Mixing up a batch of salt dough is genuinely one of the most satisfying parts of holiday crafting, and it only takes flour, salt, and water stirred together until it feels like play dough. Roll it out to about a quarter-inch thickness on a floured counter, then let kids press cookie cutters into stars, trees, and gingerbread shapes of their own choosing. Poke a small hole near the top of each shape with a straw before baking, so there’s somewhere to thread a ribbon later. Bake on low heat until the dough feels firm all the way through, then let the ornaments cool completely before painting them in whatever colors feel right.
4. Cotton Ball Snowman Ornament
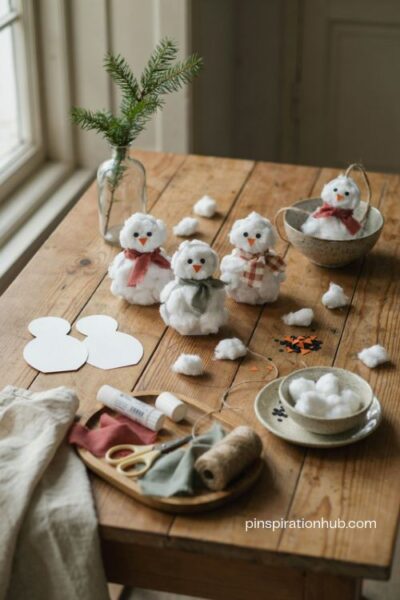
Cut a rounded snowman shape from plain white cardstock as your starting base, then let kids go to town covering it with cotton balls pulled apart and glued on in overlapping layers. A small orange triangle makes a convincing carrot nose, and two black dot eyes give the whole thing personality fast. A tiny scrap of fabric or ribbon tied around the neck as a scarf adds a nice pop of color against all that white. This is one of the gentler, less messy projects on the list, which makes it a solid pick for toddlers or younger siblings who want to join in without needing much supervision.
5. Paper Plate Snowflake
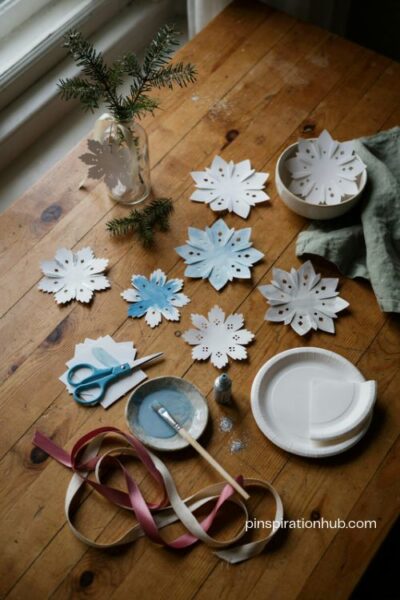
A plain paper plate turns into a surprisingly elegant snowflake with just a pair of scissors and some planning. Fold the plate in half, then in half again, and snip small triangles and notches along the folded edges before opening it back up to reveal the pattern. Kids can paint the finished snowflake white or icy blue, then add a light dusting of glitter glue along the edges while the paint is still slightly tacky so it actually sticks. Punch a hole near one point and thread ribbon through for hanging. No two snowflakes ever come out looking quite the same, which is half the fun of doing a batch together.
6. Clear Fillable Ornament
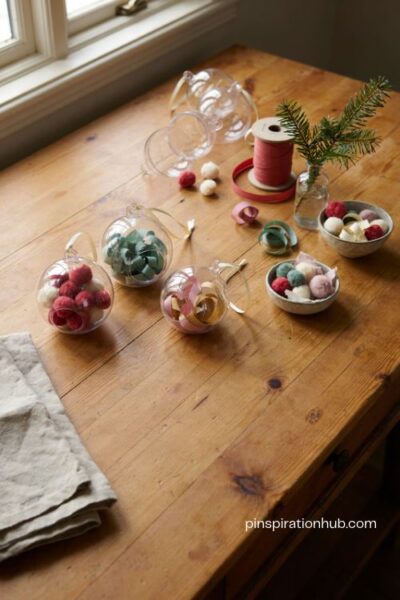
Plastic fillable ornaments split apart into two halves, which makes them the easiest blank canvas for kids to fill with whatever catches their eye. Small pom-poms, curled ribbon scraps, or torn bits of tissue paper all work well and create a nice layered look once the ornament snaps back shut. Fill it about two-thirds full rather than all the way, since the pieces need a little room to shift and settle. Snap the two halves together firmly and loop a ribbon through the built-in hook at the top. Each child ends up with a completely different combination, which makes a whole batch look great grouped together on one branch.
7. Cinnamon Stick Tree
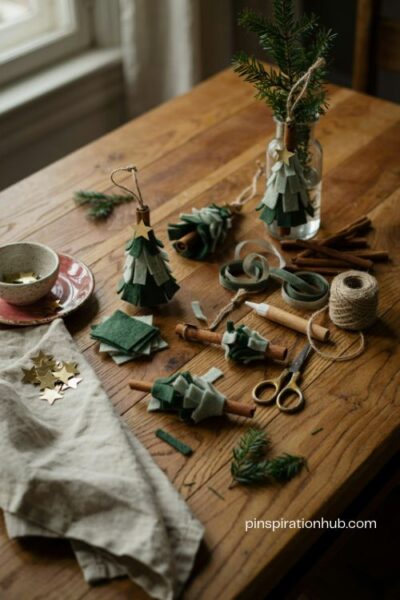
A single cinnamon stick standing upright becomes the trunk for this rustic little ornament, and it adds a genuinely nice scent to the tree as a bonus. Glue short pieces of green ribbon or felt across the stick in horizontal rows, starting with the widest piece near the bottom and working up to shorter pieces near the top. A tiny gold star glued at the very tip finishes the shape off, and a loop of twine tied just below the star gives it something to hang from. Let the glue set for a full hour before hanging it, since the ribbon layers can slip if they’re handled too soon.
8. Fingerprint Light String Ornament
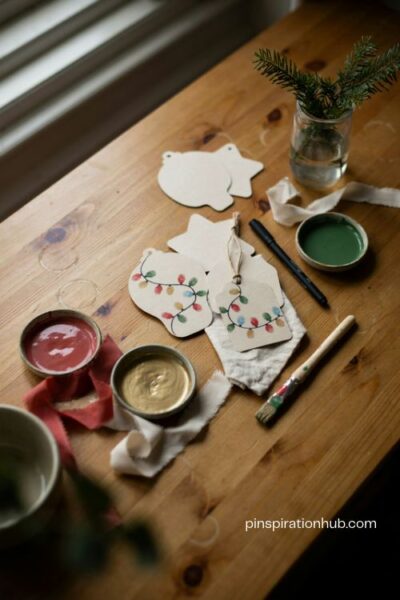
Draw a simple curved line across a piece of cardstock to represent a string of lights, then hand kids a few different paint colors and let their fingertips do the rest. Each fingerprint pressed along the line becomes a little light bulb, and mixing colors like red, green, and gold makes the string look properly festive once it’s dry. A thin black marker can connect the dots with a simple wire line after the paint sets. Trim the cardstock into a tag shape or a full ornament outline before adding a ribbon loop. Every fingerprint comes out slightly different in size, so the finished piece always feels personal rather than perfectly uniform.
9. Mini Paper Cup Santa
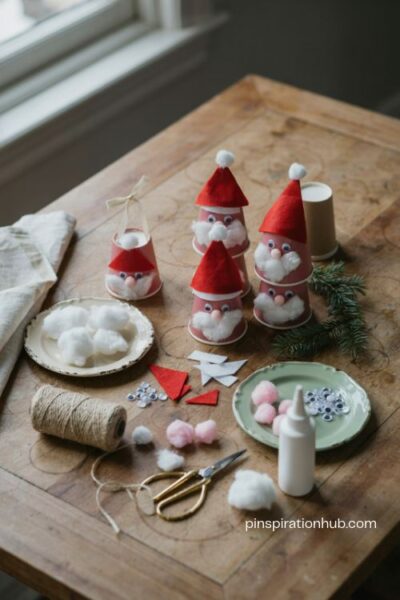
A small paper cup turned upside down makes a surprisingly good base for a tiny Santa figure. Wrap or paint the cup red, then glue on a cotton ball beard and a small circle of white trim near the rim to look like the edge of his coat. Two googly eyes and a small pink pom-pom nose finish the face, and a folded paper triangle hat with a cotton puff on top completes the look. Poke a small hole through the rim before gluing anything on, so there’s an easy spot to thread a ribbon through later. Younger kids may need a hand with the gluing, but the shape itself comes together fast.
10. Clothespin Reindeer
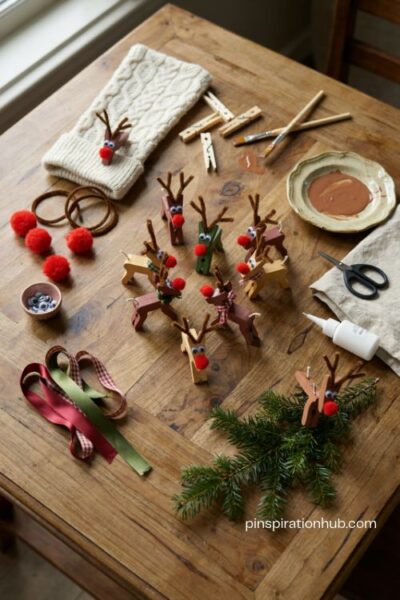
A plain wooden clothespin, painted brown and left to dry, becomes the sturdy little body for this reindeer ornament. Glue on googly eyes and a small red pom-pom nose toward the clipped end, then attach two thin brown pipe-cleaner antlers bent into a Y-shape right behind the eyes. A short piece of ribbon tied around the “neck” like a tiny scarf adds a nice finishing touch. The clip function still works once it’s finished, so kids can clip theirs onto a stocking, a gift tag, or a lower tree branch instead of just hanging it from a loop. Making a small herd of these together is half the fun.
11. Beaded Pipe Cleaner Tree
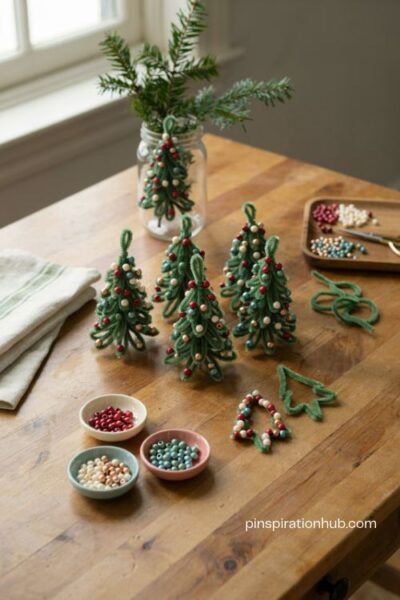
Thread a mix of colorful craft beads onto a green pipe cleaner, then bend the whole thing into a simple cone or zigzag shape to suggest tree branches. Larger beads near the bottom and smaller ones toward the top give the shape a more realistic taper, similar to a real tree’s silhouette. Twist a small loop at the very top before adding the last bead, which gives you a built-in spot to hang it from without any extra ribbon. Supervise younger kids closely during this one, since loose beads are a genuine choking hazard if left unattended on the table. Older kids can usually manage the threading part entirely on their own.
12. Photo Keepsake Ornament
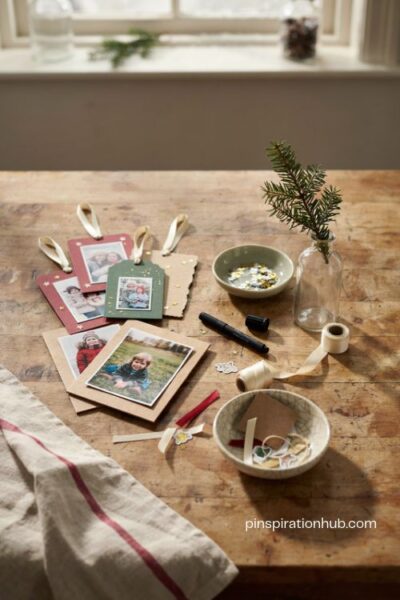
Turn a favorite photo from the year into an ornament that actually gets pulled out and looked at every December. Trim a small photo to fit inside a simple paper or cardboard frame, then let kids decorate the border with stickers, markers, or a light scatter of glitter glue. Writing the date and a short note on the back turns it into even more of a keepsake down the road. A hole punched at the top holds a ribbon loop for hanging on the tree. These tend to become the ornaments families actually save for years, since they capture exactly what a kid looked like that particular Christmas.
13. Orange and Clove Pomander

This one leans old-fashioned, but kids genuinely love how good it smells once it’s finished. Press whole cloves into the skin of an orange in a simple pattern — rows, spirals, or just scattered however a kid feels like arranging them. Wrapping a ribbon around the orange first, crossing it at the top like a gift, gives you a clean line to follow when placing the cloves and also creates a loop for hanging. Let the orange dry somewhere cool for about a week so it firms up and holds its scent longer. It’s a nice, low-mess project for slightly older kids who can handle pressing the cloves in without help.
14. Yarn-Wrapped Star Ornament
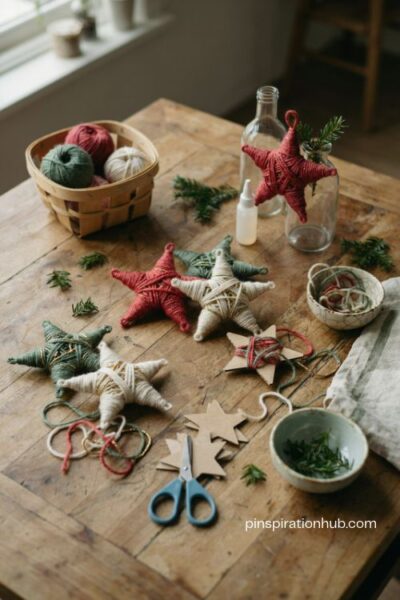
Cut a simple star shape from a scrap of cardboard as your base, then let kids wrap yarn around it in whatever color combination they like, using small dabs of glue every few wraps to keep everything in place. Working slowly around the points of the star gives the best coverage, since it’s easy to leave gaps at the sharp corners if you rush. Once the whole shape is covered, glue a short loop of the same yarn to the back of one point for hanging. Mixing two or three yarn colors on a single star gives it a nice speckled, homemade look instead of one flat color.
15. Dried Orange Slice Fox Ornament
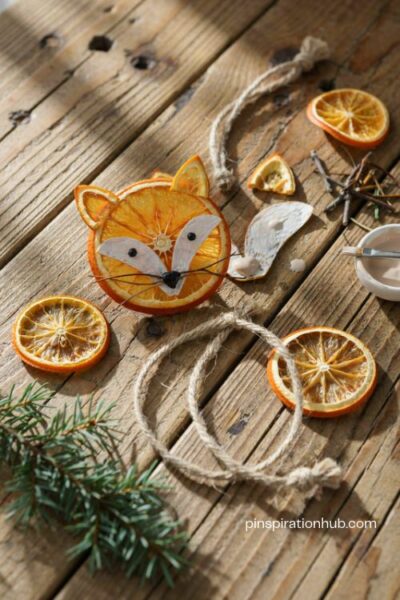
Dried orange slices have a warm, translucent look that makes a genuinely pretty base for this one. Paint a simple fox face onto the dried slice using off-white paint for the coloring around the eyes and muzzle, then add small black dots for the eyes and nose once that layer dries. Two triangle ears, cut from a second dried slice, glue onto the back top edge so they peek up naturally. A couple of thin twigs glued on either side of the nose make convincing little whiskers. Let everything dry flat overnight before adding a twine loop, since the paint needs time to fully set on the orange’s slightly bumpy surface.
Final Thoughts
There’s a good chance the ornaments on this list won’t be the neatest ones on your tree this year, and that’s honestly the whole point. A slightly lopsided popsicle stick tree or a fox with crooked ears tells you more about the kid who made it than anything bought off a shelf ever could. Pick two or three of these to start with based on whatever supplies you already have around the house, and let the rest wait for another cozy afternoon. Years from now, these are the ornaments that get pulled out first, with someone remembering exactly who made them and how old they were that Christmas.
Frequently Asked Questions
Q: What age group are these ornament crafts best suited for?
Most of these work well for kids ages 3 to 10, though a few — like the beaded pipe cleaner tree — need closer supervision for younger children because of small parts.
Q: What household items work best for last-minute ornament crafts?
Paper cups, cardboard, clothespins, and pipe cleaners are usually already on hand and require very little extra shopping to pull a project together.
Q: How can I make these ornaments last for years instead of just one season?
Use sturdy cardstock instead of thin paper, seal painted pieces with a light coat of clear craft glue or Mod Podge, and store them in a padded container between seasons.