
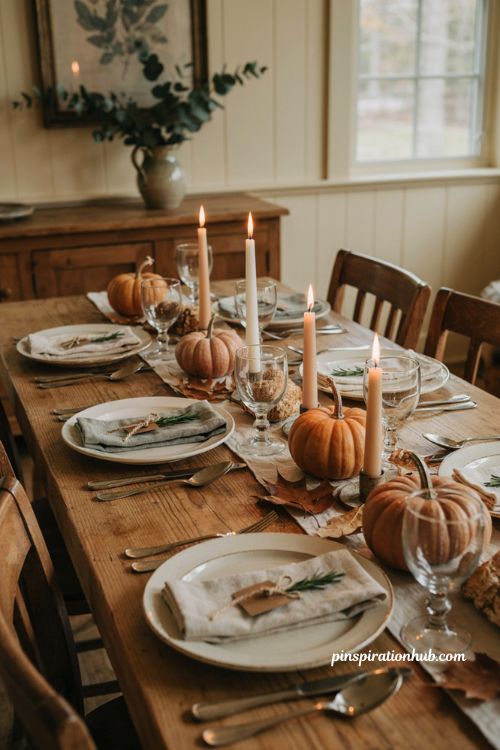
A plain orange pumpkin plunked in the center of the table can feel like an afterthought rather than a decision. It’s the default move, and it works, but it doesn’t say much about the rest of your fall tablescape.
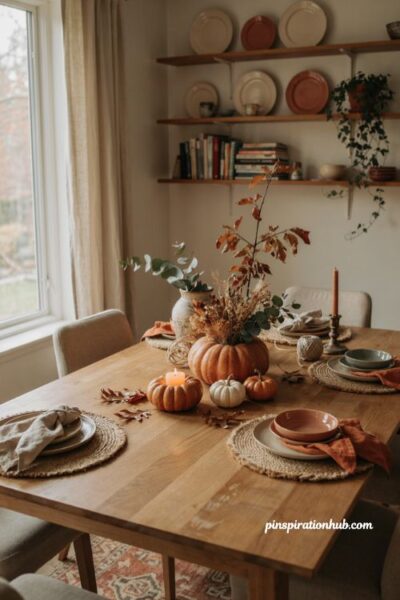
The good news is that pumpkins are one of the most versatile centerpiece materials around — they hold flowers, candles, succulents, paint, even confetti, without asking much of you in return. Whether you’re setting up for a casual Sunday dinner or dressing a table for a bigger fall gathering, there’s a version of pumpkin table decor that fits your style, your budget, and how much time you actually want to spend gluing things together. Here are fifteen ways to get there.
1. Go Moody With Gray, Green, and Purple
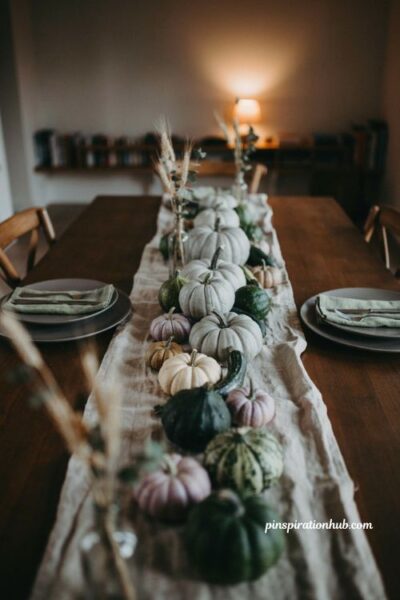
Skip the classic orange-and-black combo and build your centerpiece around gray, deep green, and soft purple instead. Line up a run of heirloom pumpkins in gray and white down the center of the table, then tuck in dark green and variegated gourds to fill the gaps and add depth. Keep the arrangement slightly asymmetrical rather than perfectly matched — a few taller pumpkins at one end and smaller ones tapering off reads far more natural. This palette works especially well if your table linens or dinnerware lean neutral, since it lets the gourds do the visual work without competing with anything else.
2. Brighten Things Up With Citrus Yellow
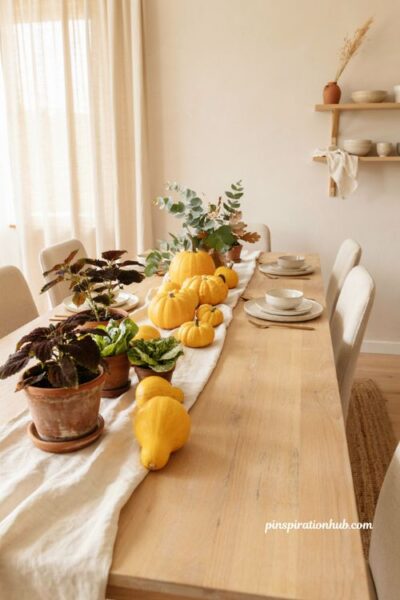
For a lighter, sunnier mood, build your centerpiece around lemony yellows and fresh greens instead of the usual deep autumn tones. Anchor one end of the table with a few clay pots in varying sizes, planted with coleus or fall lettuces for texture. Keep everything under about a foot tall so guests can still see and talk across the table. Because the gourds stay whole and uncut, this arrangement holds up well from early October clear through Thanksgiving, which makes it one of the more practical options if you don’t want to rebuild your table decor every few weeks.
3. Layer in Texture With Coral Pumpkins
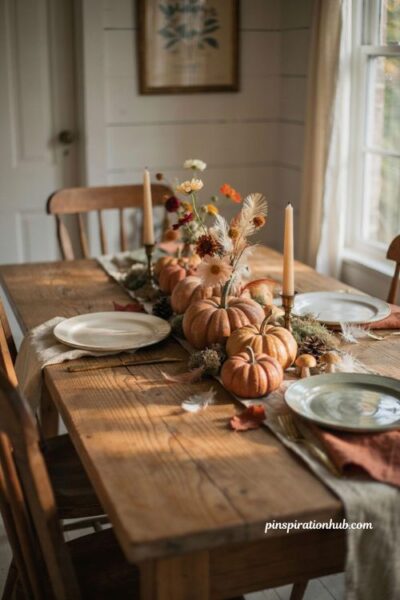
Coral and peachy-toned pumpkins bring a softer feel to a tablescape than the standard orange lineup, especially when you build in a variety of shapes and sizes. Hot glue is the real trick here — attach dried flowers, feathers, small mushrooms, reindeer moss, or pinecones directly to the tops where the stem would normally sit. Most of these materials are easy to find at a craft store or wholesale florist, and you don’t need much of any one thing to fill out several pumpkins. The mix of textures is what sells the look, so resist the urge to keep every pumpkin identical.
4. Build Height With a Tall Vase and Stacked Cloches
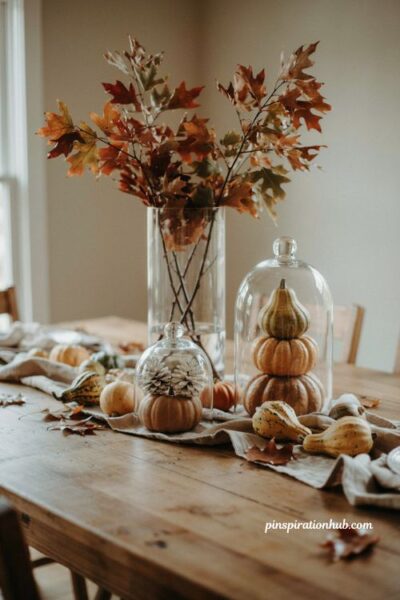
Start with a bold, simple move — a few branches of colorful fall leaves arranged loosely in a tall glass vase filled with water — and let that be your anchor. From there, stack flat gourds in graduated sizes nearby and top the group with a large glass cloche for a bit of polish. A smaller cloche filled with bleached pinecones and flipped upside down makes a nice topper for one of the flatter pumpkins. Scatter a handful of small gourds and loose leaves around the base to soften the transition between the tall vase and the lower pieces.
5. Turn Pumpkins Into Owls
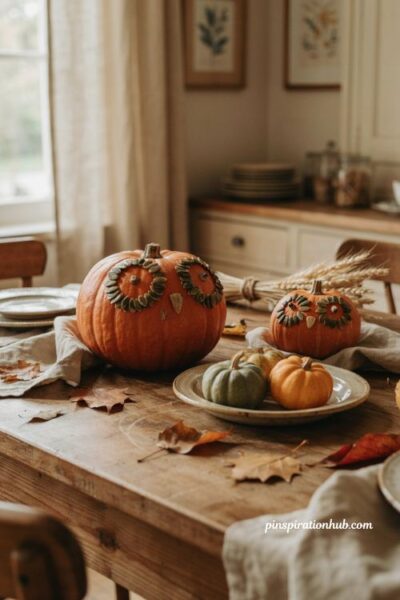
This one gets people talking more than almost anything else on the list. Hot glue a couple of mini pumpkins onto a larger one for eyes, then use pumpkin seeds pressed around the edges to border them like feathers. There’s no single right way to do it, which is part of the appeal — every owl ends up looking a little different depending on which pumpkins you grab. Set one or two along the table as a playful centerpiece rather than lining up a whole flock, since one good owl pumpkin tends to draw more attention than a repeated pattern would.
6. Plant Flowers Directly Into a Cut Pumpkin
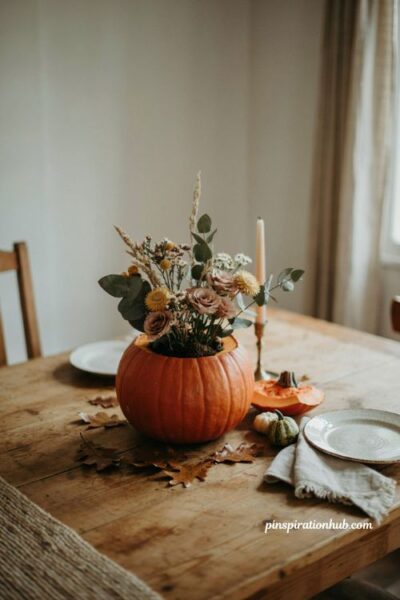
For a centerpiece that looks fuller than a simple carved pumpkin ever could, cut the top off, scoop out the seeds, and fill the cavity with soil and flowers of your choosing. A bigger pumpkin gives you more room to work with, so look for one with a nice sturdy stem while you’re picking it out — that stem often becomes part of the visual charm once the arrangement is finished. This works especially well as a single statement piece in the center of a smaller table, where one striking planted pumpkin can do more than several smaller decorations scattered around it.
7. Float Pumpkin Votives Down the Table
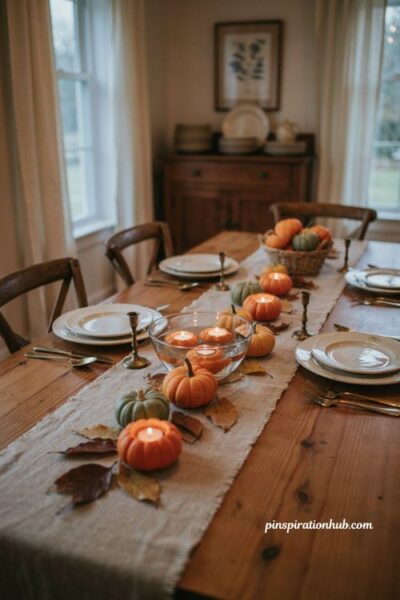
Mini pumpkins make surprisingly good votive holders once you carve a small circle into the top, sized just a bit larger than the base of a tea light. Insert the candles once the circles are cut clean, then either float the votives in a shallow bowl of water alongside a few whole mini pumpkins, or scatter them directly down the runner. The warm, low glow they give off after dark is softer than a standard candle setup, and it’s an easy way to add lighting to a table without introducing anything that doesn’t already fit the fall theme.
8. Stack Cinderella Pumpkins Into Hurricane Candles
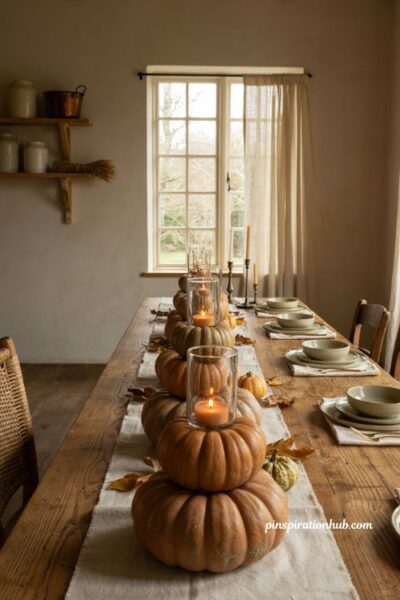
Cinderella pumpkins, with their flattened, ridged shape, make an especially good base for a hurricane-style candle display. Cut out space inside for a glass hurricane, then set your candle inside that. Stacking two or three pumpkins at slightly different heights down the center of the table creates more visual interest than a single row of matching candles would. This idea works particularly well if your table is long and could use a stronger central line running its length, since the varied heights carry the eye down the table instead of clustering everything in one spot.
9. Turn a Pumpkin Bowl Into a Mini Garden
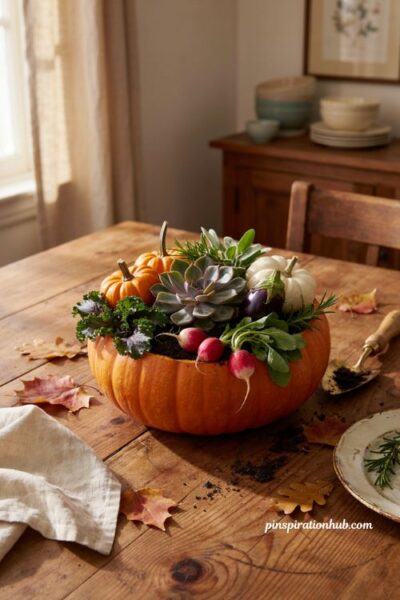
Fill a round or oval container with potting soil, then plant a cluster of small succulents like echeverias toward the center, leaving room around the edges for the rest. Nestle a few small orange and white pumpkins into the soil alongside the succulents, then tuck in seasonal vegetables like kale, radishes, or a small eggplant for color and shape variety. Fresh herb bundles, rosemary and sage work particularly well, fill in any remaining gaps and add a bit of fragrance to the table, which is a small detail most centerpieces skip entirely.
10. Paint an Ombre Row of Pumpkins
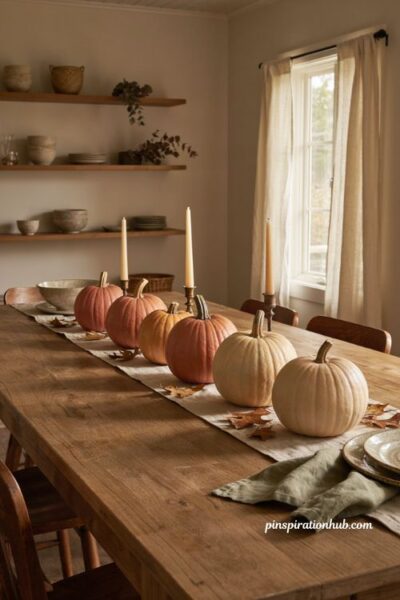
Pick one color you love and paint a set of pumpkins in graduated shades, from the deepest tone up to the palest. Line them up across the table from darkest to lightest, and the effect reads far more intentional than a random mix of solid-colored pumpkins ever would. This works with faux or real pumpkins, though faux ones let you reuse the set for years without repainting. It takes a bit of patience to get the gradient smooth, but even a slightly imperfect ombre effect still looks deliberate once the full row is lined up together.
11. Go Glam With Black and Gold
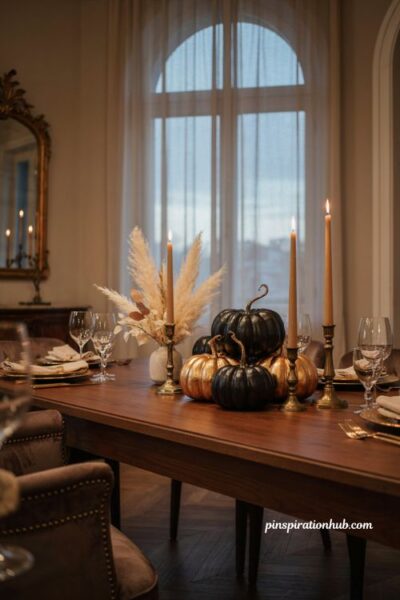
Group a cluster of pumpkins painted in black and gold near a centerpiece or off to one side of the table for a bit of shimmer without going overboard. Varying the sizes matters here — a few small pumpkins mixed with one or two larger ones gives the grouping some visual rhythm instead of a flat, uniform look. This palette pairs especially well with a table that already leans a little formal, since the metallic gold catches candlelight in a way that plain painted pumpkins don’t, adding a bit of shine once the sun goes down.
12. Build a Tiered White Pumpkin Topiary
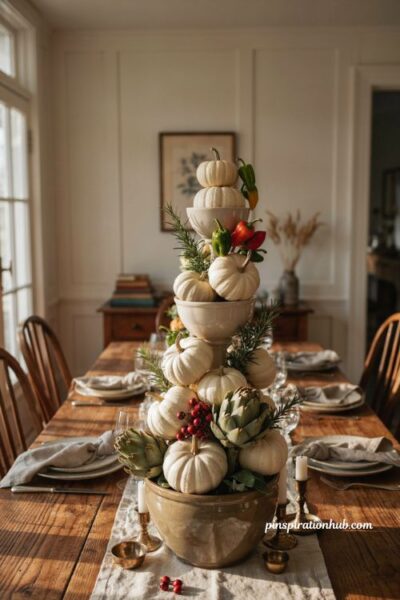
Start with three bowls in graduated sizes, filled with wet florist foam trimmed level with each rim, then stack them largest to smallest. Secure white pumpkins and artichokes into the foam at each level using florist picks, keeping the arrangement slightly asymmetrical rather than perfectly even. Fill the remaining gaps with fresh herb sprigs, pepper plants, and a handful of berries attached to picks for extra texture. It’s a more involved project than most on this list, but the finished topiary makes a genuine statement piece if you’re hosting a bigger fall gathering.
13. Pair Pumpkins With Silver Serving Pieces
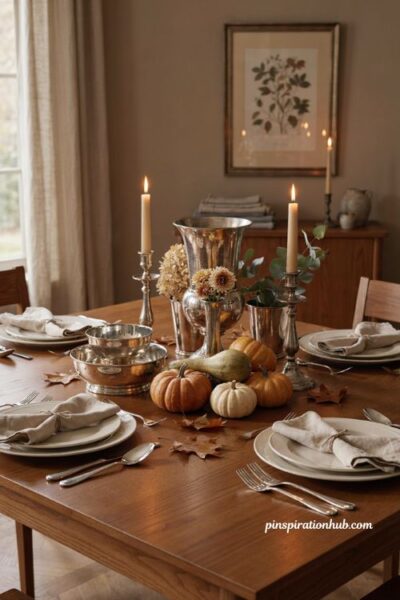
Vintage or inherited silver doesn’t need to stay in the cabinet all season — small cups make sweet little flower-and-pumpkin arrangements, while larger urns or serving bowls can anchor a bigger centerpiece. Stack a few pumpkins directly on and around the silver pieces so the two materials read as one cohesive display rather than separate elements competing for space. This combination works especially well for a more formal fall dinner, where the contrast between rustic gourds and polished silver adds a bit of unexpected elegance to an otherwise casual seasonal material.
14. Decorate the Surface With Confetti or Decoupage
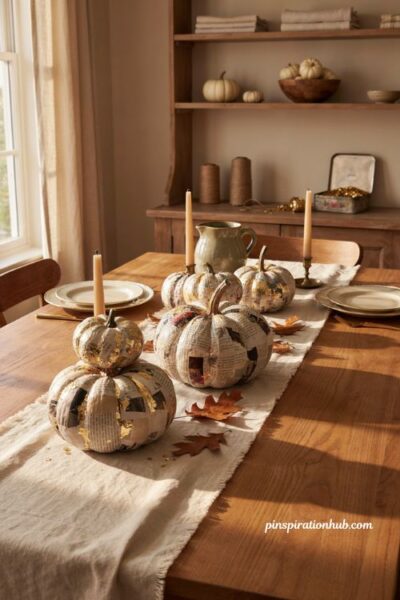
For a no-carve option that still feels handmade, brush Mod Podge or a similar adhesive onto a pumpkin’s surface and press on gold confetti, or apply torn scraps from old magazines for a decoupage effect. Both techniques let you match the color scheme to your existing table linens or dinnerware, which is harder to pull off with a plain painted pumpkin. Arrange the finished pieces as a stack, a horizontal line, or scattered individually down the table, depending on how much of a focal point you want them to be.
15. Give Every Guest a Mini Pumpkin Place Setting
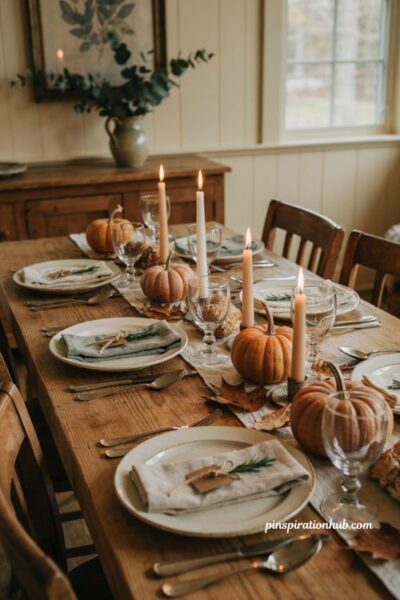
Gather a handful of mini pumpkins, one for each place setting, and tie a small name card to each stem with a length of twine. It’s a simple touch, but it makes every seat at the table feel considered rather than just filled. This works particularly well for a Friendsgiving or a smaller dinner party where you want guests to feel like the table was set with them specifically in mind, and the mini pumpkins double as a small take-home favor once the meal wraps up.
Final Thoughts
You don’t need every idea on this list — pick two or three that match the mood you’re going for and build outward from there. A tablescape that leans into texture, height, and a little bit of color usually ends up looking more finished than one built entirely around a single big pumpkin. Whatever direction you choose, remember that pumpkins are forgiving to work with, so there’s plenty of room to experiment before the table needs to be ready. However your table ends up looking, it’ll carry that easy, gathered-around-the-table feeling fall does best.
Frequently Asked Questions
Q: How long do pumpkin centerpieces last on a table?
Whole, uncut pumpkins typically last from early October through Thanksgiving, while cut or carved pumpkins should be used within a week or two before they start to soften.
Q: Can I use fake pumpkins for table decor instead of real ones?
Yes, faux pumpkins work well for painted, glued, or decoupaged projects since they hold up better long-term and can be reused for several seasons.
Q: What’s an easy pumpkin table decor idea for a last-minute dinner?
A cluster of mini pumpkins scattered down a table runner, with a few tea lights or votive pumpkins tucked in between, takes only a few minutes to put together.