
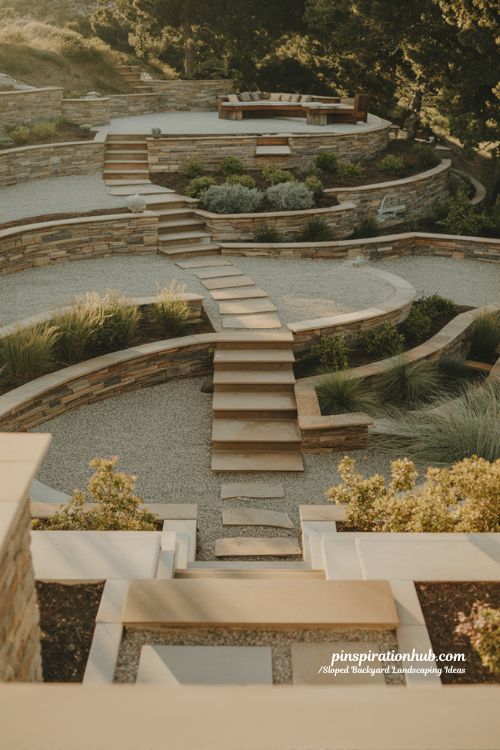
Standing in your backyard staring at a slope that swallows every landscaping idea you had? You’re not alone. So many homeowners look at uneven ground and see a problem — when really, what they have is one of the most unique opportunities in outdoor design. Sloped backyard landscaping takes more thought than a flat yard, yes. But it also gives you something a flat yard simply never can: layers, depth, drama, and spaces that feel genuinely designed. Whether your yard drops sharply at the back fence or rolls gently from one side to the other, there are smart ways to work with that grade instead of fighting it.
- A sloped yard can become a multi-level outdoor living space with retaining walls, terraced gardens, and connected pathways.
- Drainage and soil stability are the two most critical technical factors to plan before any landscaping work begins.
- Even a steep hillside can become the most visually stunning part of your home with the right hardscape and planting mix.
Why a Slope Is Really an Outdoor Design Opportunity
A flat yard is a blank canvas — easy to plan, easy to build on. A sloped yard is more like a sculpture waiting to happen. The elevation changes force you to think in three dimensions, which means every patio, garden bed, or step you add shapes how the space reads from multiple angles.
The real challenge with a slope isn’t the grade itself — it’s managing what happens when it rains. Water moves fast downhill, and without proper planning, it takes your soil with it. Retaining walls, drainage channels, and well-chosen plantings aren’t just design choices on a sloped property. They’re functional necessities. Get the structure right first, and the beauty follows naturally.
| Feature | Flat Yard | Sloped Yard |
|---|---|---|
| Visual interest potential | Moderate | High |
| Drainage planning | Standard | Critical |
| Terracing options | None | Excellent |
| Natural privacy zones | Requires structures | Built into the grade |
| Multi-level design | Not possible | Natural advantage |
17 Sloped Backyard Landscaping Ideas Worth Stealing
1. Multi-Level Retaining Walls That Double as Design Features
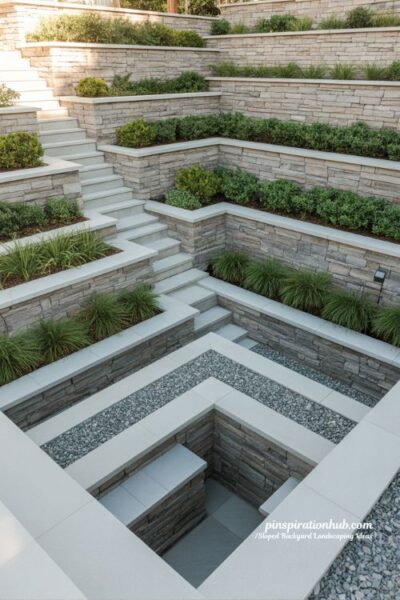
Retaining walls are the backbone of any serious sloped backyard project. Breaking the slope into multiple smaller levels keeps soil stable while creating distinct zones for sitting, planting, or entertaining. The walls themselves become design elements when finished in natural stone, concrete block, or textured stucco. Each terraced section gets its own purpose, and the whole yard reads as intentional rather than improvised.
- Step walls down in increments no taller than 3–4 feet for safety and visual proportion
- Match wall materials to your home’s exterior for a cohesive look
- Leave planting pockets between wall sections to soften hardscape with greenery
2. Curved Pathways That Follow the Natural Flow of the Land
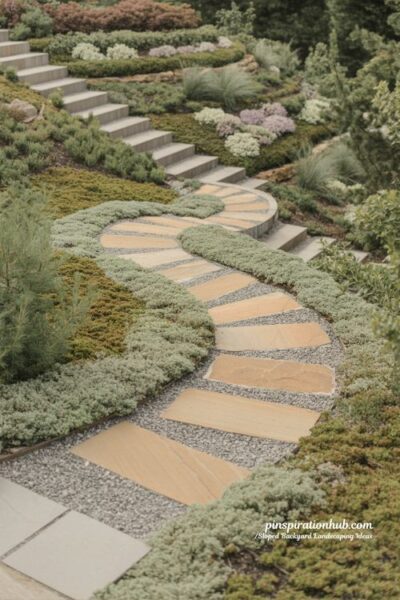
Curved walkways work with the grade instead of fighting it, guiding people smoothly from one level to the next. A gently winding path creates a sense of journey — each turn reveals a new view or garden section. Straight paths feel awkward on a slope because they fight the natural movement of the land. Flagstone, concrete pavers, and compacted gravel all work depending on your style and the steepness of the terrain.
- Keep path width at 36–48 inches minimum to feel comfortable and accessible
- Use stepping stones on gentler grades, compacted pavers on steeper runs
- Line pathway edges with low-growing plants to soften borders and prevent erosion
3. Tiered Garden Beds for Flowers, Herbs, and Vegetables
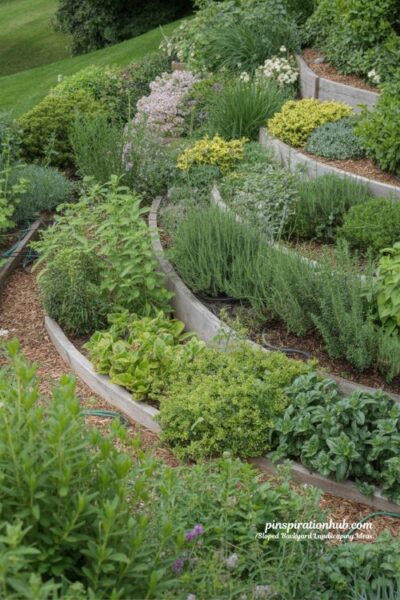
A slope is actually ideal for tiered planting because the levels are already defined by the terrain. Each bed sits naturally on its own flat section, making watering and weeding far easier than working on a bare hillside. Different tiers hold different plant types — perennial flowers on upper levels, herbs in the middle, groundcovers along the lowest edges. The layered effect creates rich visual texture that reads beautifully from multiple angles.
- Mix plant heights across tiers for depth — tall grasses behind, low sedums in front
- Use landscape fabric under beds to suppress weeds while maintaining drainage
- South-facing slopes are ideal for edible gardens where sunlight hits all levels consistently
4. Natural Stone Steps That Connect Every Level
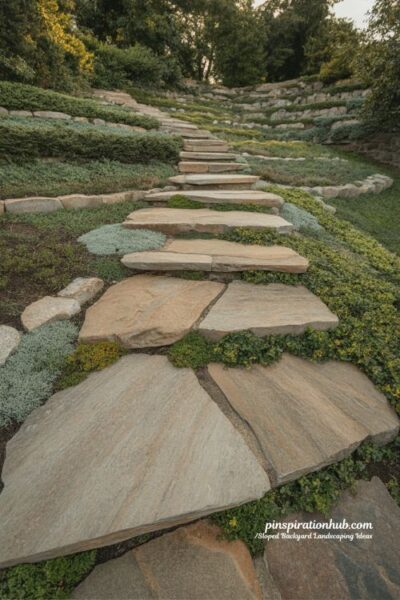
Stone steps belong on a hillside the way they don’t quite belong anywhere else. They have a weight and permanence that manufactured materials can’t replicate. Whether you run them straight up the yard or curve them around garden beds, well-placed steps make movement between levels feel safe and intentional. They anchor the whole design by creating a clear visual axis through the space, giving your eye somewhere to travel naturally.
- Use stones at least 6 inches thick and 18 inches deep for a solid, safe surface
- Set each tread with a slight backward slope so water drains away from the step edge
- Plant creeping thyme or moss between stones for a naturalistic, lived-in look over time
5. A Flat Patio Carved Into the Upper Slope
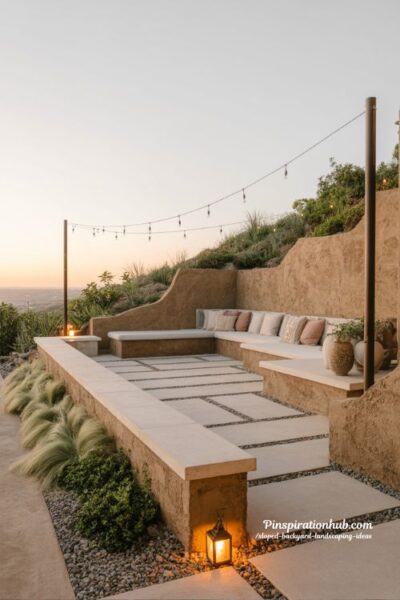
Carving a flat patio into the hillside creates a platform that overlooks the rest of the yard — almost like a private balcony. Surrounded by retaining walls on the uphill side and open on the lower side, this patio feels sheltered without being enclosed. Large-format concrete pavers or smooth flagstone create a clean, level surface that wears well for years. Position it toward the best view and this spot becomes the destination everyone gravitates to on a warm evening outdoors.
- Use a compacted gravel base or poured concrete to ensure the patio stays level
- Add a low retaining wall along the back that doubles as seating with a wide cap
- String lights overhead or post lights at the corners to extend usability after dark
6. A Sunken Fire Pit Area Built Into the Grade
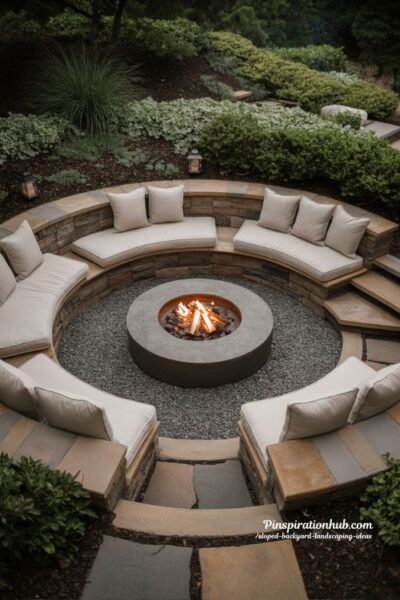
A fire pit tucked slightly below grade feels sheltered, wind-protected, and naturally intimate. A sloped yard makes this easy because the elevation change is already there to work with. Dig into the slope to create a sunken circle for the fire pit and surrounding seating. Surround it with flat pavers, add curved bench seating, and it instantly becomes the most-used and most-loved spot in the entire backyard — especially on cool evenings when the fire is going.
- Set the fire pit on a non-combustible base at least 18 inches deep — gravel or poured concrete work
- Keep surrounding seating at the same level as the fire pit rim for an open, comfortable feel
- Choose a spot with natural wind protection from the grade or planting on at least two sides
7. A Multi-Level Pool That Uses Elevation as an Advantage
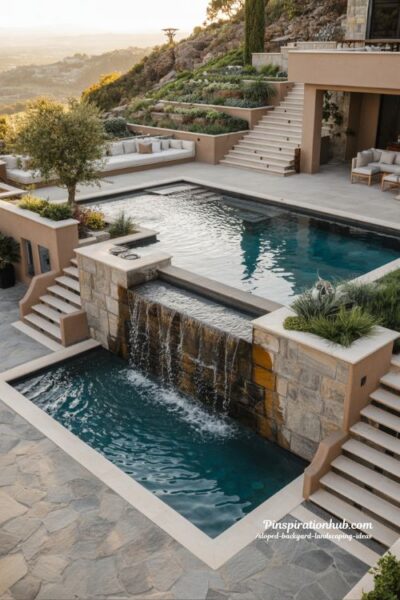
Positioning a pool at a mid or lower level of the yard creates a dramatic terrace effect. The pool sits below a higher entertaining area, connected by steps, and surrounded by a paved lounging deck. Retaining walls support the pool structure on the uphill side and often become beautiful features finished in stone veneer. This layout gives the entire backyard a layered, resort-like quality that a flat-yard pool simply cannot replicate regardless of budget or materials used.
- Work with a structural engineer if your slope exceeds 15 percent grade before pool placement
- Use the retaining wall behind the pool as a water feature — a sheer descent waterfall looks stunning
- Pave the lounging deck in textured stone or non-slip concrete slab for wet-foot safety
8. Dry Creek Beds That Handle Drainage and Look Intentional
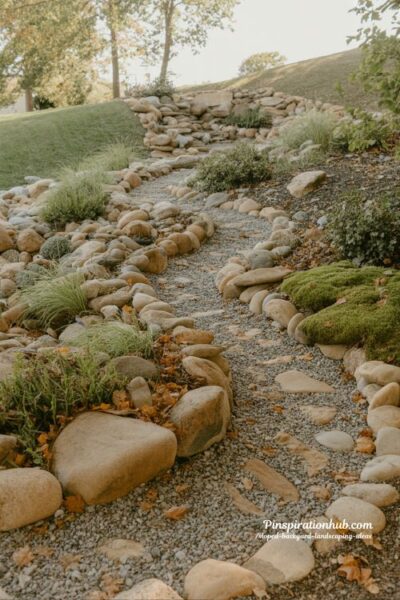
A dry creek bed handles water runoff while looking like a deliberate design choice. Built to mimic a natural streambed, it channels water during rain and sits as a decorative feature the rest of the time. Fill it with rounded river rock in two or three sizes, edge it with boulders, and plant native grasses along the sides. This is one of the rare landscaping solutions where the functional element and the beautiful element are exactly the same thing at the same time.
- Follow the natural low point of your slope — gravity already knows the best route
- Bury a perforated drain pipe under the rock bed in high-flow areas for added capacity
- Mix river rock sizes from fist-sized to boulder — variety creates authentic naturalistic texture
9. A Hillside Rock Garden With Drought-Tolerant Native Plants
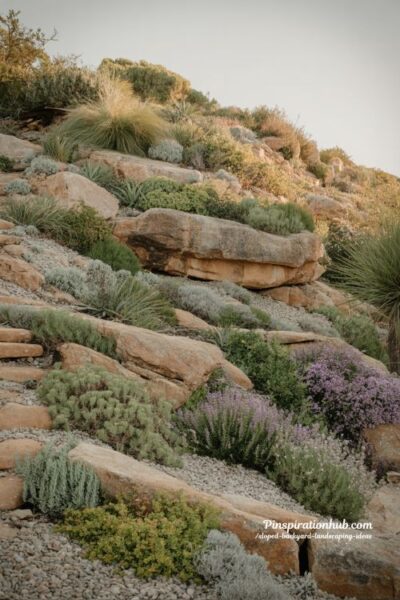
A rock garden works with the natural character of a hillside better than almost any other approach. Large boulders and rough stone create structure, while drought-tolerant plants fill in around them. Sedums, ornamental grasses, lavender, creeping phlox, and wild thyme all thrive in rocky, well-drained hillside conditions. The result looks effortlessly natural and needs almost no irrigation or weeding once established — making it one of the smartest ideas for a low-maintenance outdoor space.
- Place the largest boulders first, partially buried, to anchor the design visually and structurally
- Choose plants that spread horizontally — they cover more ground and stay naturally lower
- South-facing slopes with good drainage are ideal for Mediterranean herbs like lavender and rosemary
10. An Integrated Garden Shed Built Into the Hillside
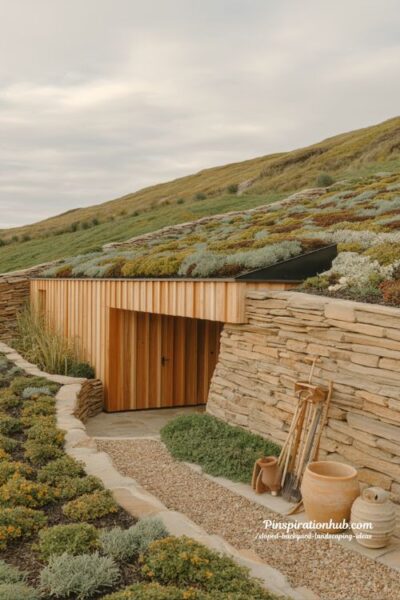
A slope can hide a garden shed better than any flat yard ever could. By building partially into the hillside, a shed becomes almost invisible from above while remaining fully accessible from the lower level. Finish the exterior with decorative stone or horizontal cedar boards to match surrounding hardscape, and plant groundcovers along the roofline where it meets the slope. The result is functional storage that reads as part of the landscape rather than a structure dropped awkwardly onto it.
- Anchor the shed frame securely into the slope for structural stability
- Use the shed’s roofline as a planting opportunity — shallow-rooted sedums work as a simple green roof
- Ensure the door opens at the lower grade level so carrying tools in and out doesn’t fight the slope
11. Terraced Outdoor Dining on Its Own Dedicated Level
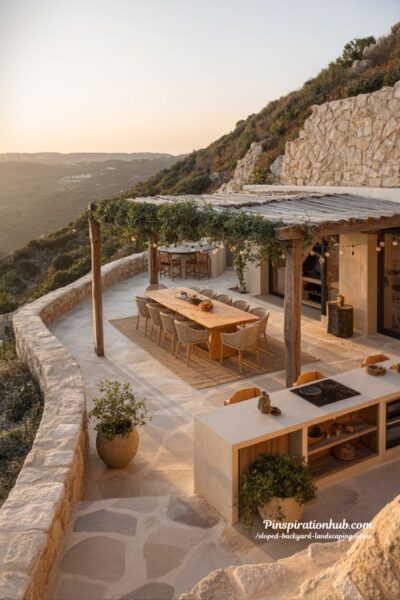
One flat terraced level becomes a dedicated dining area surrounded by retaining walls on the uphill side and open views on the downhill side. Add a pergola overhead, string lights, and a nearby outdoor kitchen, and you’ve built one of the most-used spaces on the property. This idea works on nearly any sloped yard and across a wide range of budgets. The key is giving the space its own defined identity so it feels like a destination rather than just another paved area.
- Size the dining terrace to fit your table with at least 4 feet of clearance on all sides
- Orient the space toward the best downhill view — slopes almost always offer one
- Plant fast-growing climbers along the uphill retaining wall for green privacy quickly
12. Groundcover Planting to Stabilize and Cover Bare Slopes
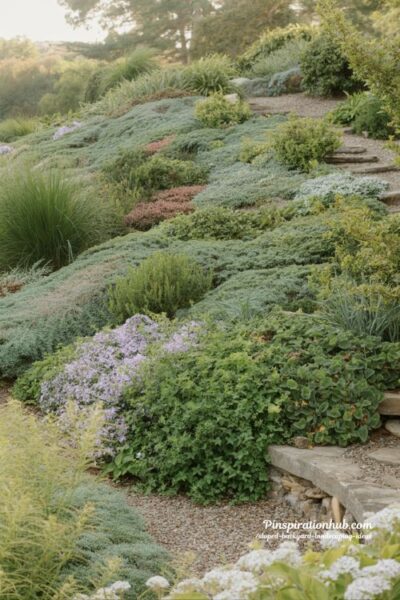
Sometimes the smartest move is covering bare ground with dense, fast-rooting groundcover plants that stabilize soil, prevent erosion, and look lush year-round with almost zero ongoing care. Creeping phlox, ivy, vinca, and ornamental grasses all work brilliantly on sloped ground. This is one of the most budget-friendly approaches available, and on a large or gently rolling slope it creates a sweeping, carpet-like effect that’s genuinely beautiful in its simplicity and naturalistic appeal.
- Plant groundcovers in staggered rows rather than straight lines for faster, denser coverage
- Water consistently for the first full growing season, then reduce — most are drought-tolerant once established
- Mix two or three species for visual interest instead of a single-species monoculture
13. An Elevated Wooden Deck Cantilevered Over the Slope
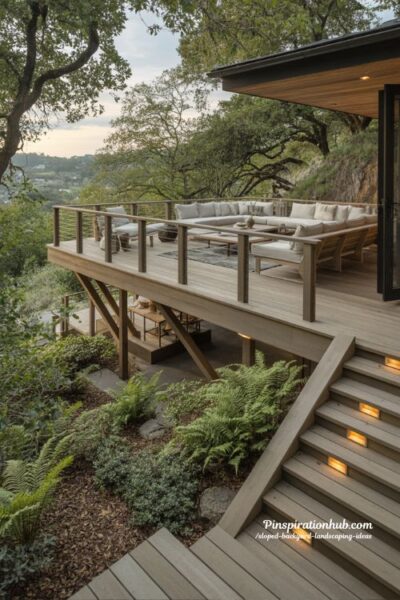
Where the slope drops sharply near the house, a deck bridges the elevation change completely. Post-supported or cantilevered out from the home at door level, it creates instant outdoor living space without major earthwork below. Composite or pressure-treated wood handle the moisture from a hillside far better than natural wood over time. The area underneath can be left as shaded garden, planted with ferns, or enclosed for storage with proper skirting added around the perimeter.
- Composite decking handles hillside moisture better than natural wood over the long term
- Post depth is critical on slopes — consult a structural engineer for footings on steeper grades
- Leave at least 18 inches of clearance under the deck for air circulation to prevent moisture buildup
14. Landscape Lighting That Makes the Slope Come Alive After Dark
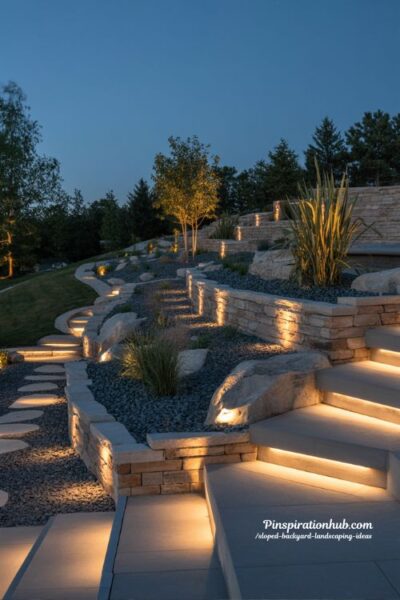
Sloped backyards have a genuine lighting advantage because multiple levels mean multiple surfaces to illuminate. Step lights embedded into risers make movement safe. Uplighting on a stone retaining wall creates beautiful texture and depth. Spotlights in plant beds highlight boulders and specimen trees. A properly lit sloped backyard at night looks more layered and thoughtfully designed than almost any flat yard could, because the elevation itself becomes part of the light composition.
- Use low-voltage LED systems to keep energy costs manageable across a larger installation
- Install conduit during hardscape construction — retrofitting electrical through finished walls costs far more
- Prioritize lighting at every grade change — steps and level transitions are safety-critical and visually dramatic
15. A Cascading Water Feature That Flows With the Grade
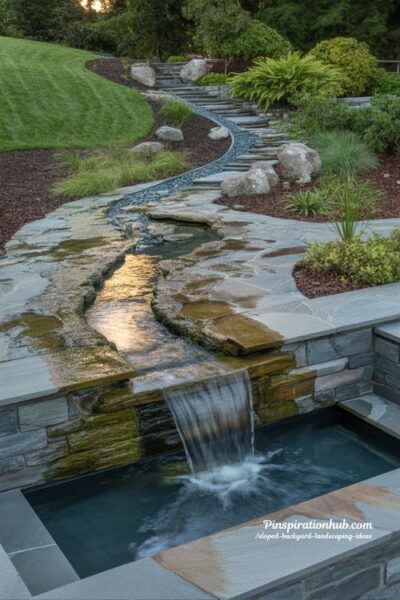
Water features belong on slopes in a way they simply don’t on flat ground. A cascading waterfall over a stone retaining wall, or a naturalistic stream flowing down a rocky channel, uses gravity the way it was meant to be used. The sound of moving water carries through the whole yard, and the visual movement draws the eye naturally from top to bottom. Even a simple recirculating fountain built into a wall creates an enormous amount of character and atmosphere throughout the space.
- Size the pump to the height of the drop — an undersized pump creates a trickle rather than a true flow
- Use dark-colored stone or liner in the basin so water reads as deep and clear
- Position the feature where it’s visible from both an upper seating area and the lower yard
16. Creeping Phlox for a Hillside of Brilliant Spring Color
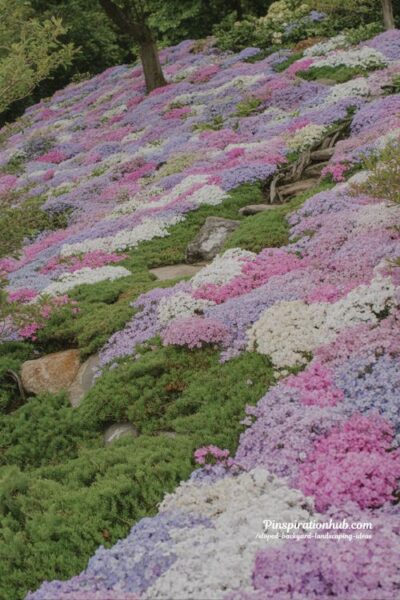
Few plants are more effective on a slope than creeping phlox. It roots deeply, spreads horizontally, requires almost no care after establishment, and every spring erupts in a carpet of pink, white, or purple flowers. Planted on a sunny slope, it covers bare soil fast, survives drought without complaint, and holds the hillside far better than most groundcovers. It’s also evergreen in most climates, giving the slope coverage and color across all four seasons without significant intervention.
- Plant in well-drained soil — creeping phlox is sensitive to wet feet and struggles in heavy clay
- Space plants 12–18 inches apart and they fill in within one to two growing seasons
- Trim lightly after flowering to encourage dense, compact growth going forward
17. A Meadow Garden for a Relaxed, Natural Hillside Feel
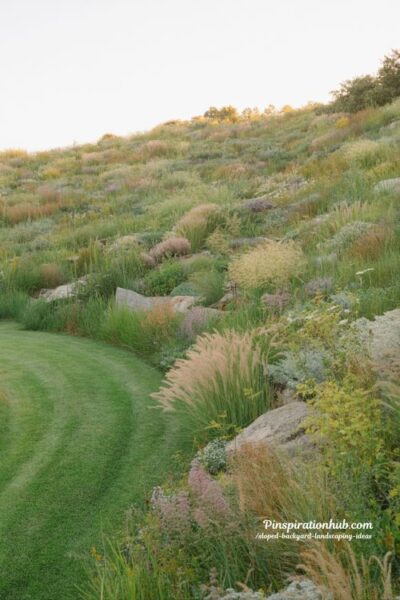
A hillside meadow of native grasses, wildflowers, and self-seeding perennials moves beautifully in the breeze, needs almost no maintenance after establishment, and supports pollinators and birds. It looks intentional rather than neglected when edged clearly along pathways and the lower yard boundary. Choose regionally native species for the best results — they’re already adapted to your specific soil and climate, and they establish faster and look better on a natural hillside than non-native ornamentals ever do.
- Edge the meadow clearly with a mown strip or defined stone border — this signals intentionality
- Removing existing weeds and grasses before planting is the most important step for success
- Expect it to look sparse in year one and genuinely beautiful from year two onward
Quick-Reference Guide: Choosing the Right Idea for Your Slope
| Idea | Best Slope Grade | Budget | Best For |
|---|---|---|---|
| Multi-level retaining walls | Moderate–steep | $$–$$$ | All properties |
| Curved pathways | Gentle–moderate | $–$$ | Connecting levels |
| Tiered garden beds | Gentle–moderate | $–$$ | Plant lovers |
| Natural stone steps | Any grade | $$–$$$ | Every sloped yard |
| Carved patio | Moderate | $$–$$$ | Entertaining |
| Sunken fire pit | Gentle–moderate | $$–$$$ | Socializing |
| Multi-level pool | Moderate–steep | $$$$ | Luxury builds |
| Dry creek bed | Any grade | $–$$ | Drainage areas |
| Rock garden | Steep | $ | Low-maintenance yards |
| Built-in shed | Moderate–steep | $$–$$$ | Storage needs |
| Terraced dining | Gentle–moderate | $$–$$$ | Outdoor entertaining |
| Groundcover planting | Any grade | $ | Budget-conscious owners |
| Elevated deck | Steep near house | $$–$$$ | Post-and-beam builds |
| Landscape lighting | Any grade | $–$$ | Evening use |
| Cascading water feature | Moderate–steep | $$–$$$ | Feature gardens |
| Creeping phlox | Gentle–steep | $ | Low-maintenance cover |
| Meadow garden | Any grade | $–$$ | Large naturalistic slopes |
FAQ About Sloped Backyard Landscaping
What should I do first before landscaping a sloped backyard?
Walk the yard during and after a rainfall to see how water moves across the grade. Mark the high and low points, note any erosion already happening, and identify where water pools. This tells you where drainage features and retaining walls need to go before anything else. Getting water management right first saves you from expensive repairs later.
Do I need a permit for retaining walls on a slope?
Most regions allow walls under 3 to 4 feet without a permit, but taller walls near pools or structural elements usually require engineering approval. Rules vary by city and county, so check your local building department before starting. Terracing with multiple smaller walls instead of one tall wall often keeps you under the permit threshold entirely.
How do I stop erosion on a steep sloped backyard?
Use a combination of approaches. Plant deep-rooted groundcovers as quickly as possible — bare soil is your biggest enemy on a slope. Add retaining walls or rock borders to slow water flow, and use dry creek beds or French drains to channel runoff away from exposed areas. Erosion-control fabric during plant establishment keeps soil in place while roots get established.
Is sloped backyard landscaping more expensive than a flat yard?
Generally yes, because slopes require more labor and structural work — retaining walls, engineered footings, drainage systems, and steps all add cost. That said, budget-friendly approaches like groundcover planting or a simple rock garden can transform a sloped yard for a modest investment. The biggest cost driver is how much flat usable space you want to create through terracing.
What plants grow best on a slope?
Plants with deep, spreading root systems perform best. Creeping phlox, ornamental grasses, lavender, rosemary, vinca, ivy, juniper, and native wildflowers all anchor into slope soil quickly and spread efficiently. Avoid shallow-rooted plants that won’t hold in loose soil. On steeper grades, always combine planting with physical erosion control — fabric, rock borders, or retaining walls — especially in the first growing season.