
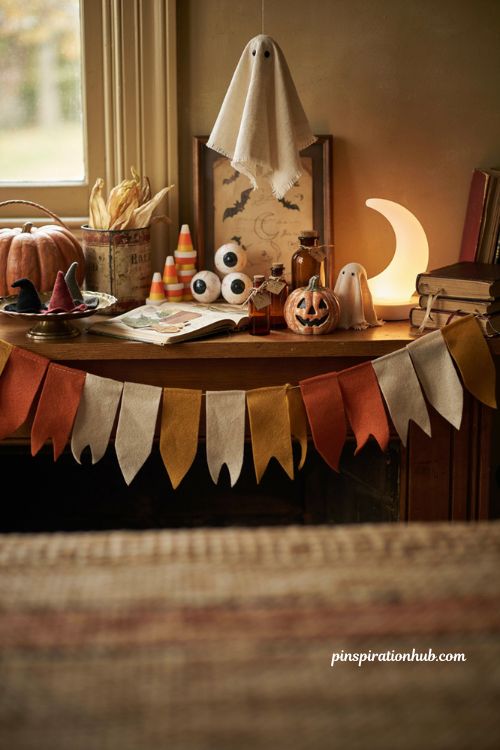
Now drafting the 15 ideas from the source material (felt garlands, clay eyeballs, papier mâché buckets, upcycled tins, thrifted jack-o’-lanterns, milk glass ghosts, moon lamp, spell books, junk journals, floating ghosts, candy corn spools, potion bottles, footed trays, ephemera art, felt witch hats).
15 DIY Vintage Halloween Decor Ideas That Look Genuinely Retro
There’s a reason real vintage Halloween pieces sell for so much at flea markets and estate sales — that soft, worn, slightly creepy charm just doesn’t show up in anything plastic off a shelf. The good news is you don’t have to pay collector prices to get that look in your own home. With a little felt, some paint, and a habit of checking the thrift store before the craft aisle, you can build a whole shelf of retro-inspired Halloween pieces that actually hold up to scrutiny. These fifteen ideas lean on cheap materials and a few upcycled finds, so the “vintage” part comes from the look, not the price tag.
1. Felt Ghost and Bat Garland
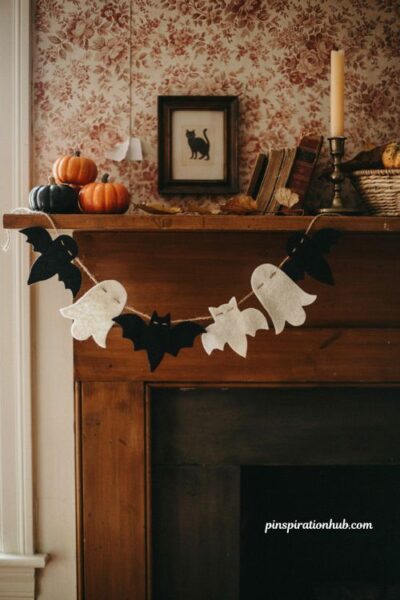
A simple garland is one of the fastest ways to bring retro Halloween charm into a room, and felt makes it almost foolproof. Print out ghost and bat silhouettes, trace them onto a few sheets of cheap felt, cut the shapes out, and hot glue each one along a length of twine. The slightly imperfect edges you get from cutting felt by hand are actually part of the charm — they read as handmade rather than mass-produced, which is exactly the retro effect you’re after. Hang it along a mantel, a window, or a stair rail, and keep the twine loose enough that the shapes swing a little when someone walks by.
2. Clay Eyeball Jars
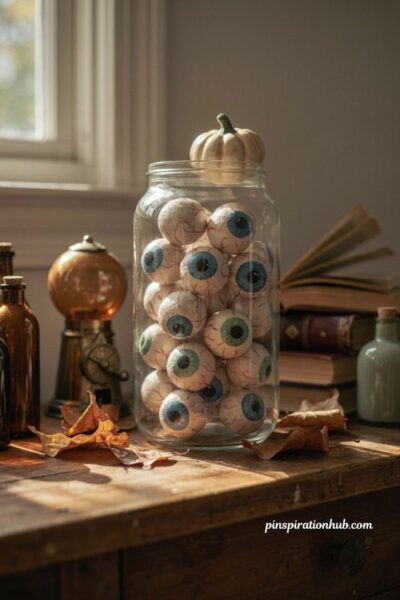
Paperclay is forgiving enough for a first-time sculptor, which makes it perfect for rolling out a small batch of creepy glass eyeballs. Shape a handful of rough spheres, paint on irises and a few red veins once they’ve dried, and drop the finished eyes into a clear jar or an old gumball machine for display. Grouping several eyes together in one container reads far spookier than scattering a couple around the room, and the slightly uneven shapes you get from hand-forming each one give it that flea-market-find look instead of a factory-molded one.
3. Groovy Fabric Ghosts
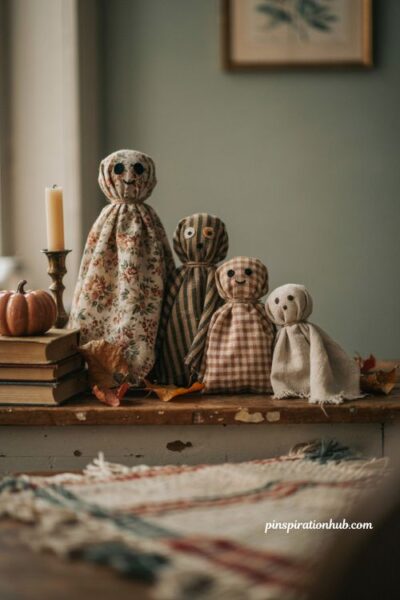
An old bedsheet you were about to donate is exactly what this project wants. Drape a square of fabric over a lightweight base like a foam ball or a bundle of newspaper, cinch it at the neck with string, and paint on a simple face once it’s secured. Vintage floral or striped sheets give the ghost an unexpected, slightly retro personality that a plain white sheet never will. Cluster three or four different-sized ghosts together on a shelf or porch step, since the variation in height and fabric pattern is what makes the group feel collected over time rather than bought all at once.
4. Felt Witch Hat for You (and Your Pet)
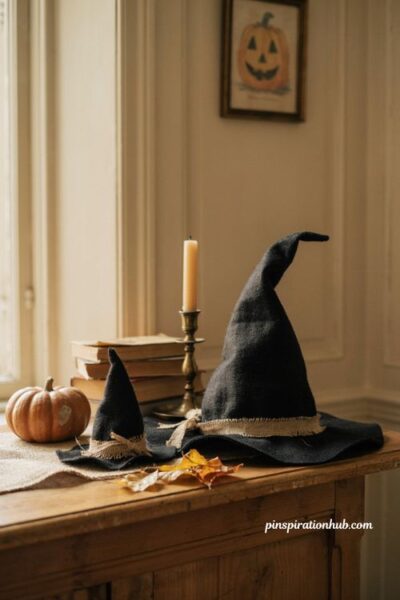
A witch hat cut from stiff felt comes together with just a cone shape, a wide brim circle, and a hot glue gun — no sewing machine required. Add a strip of ribbon or burlap around the base for a finished edge, and if you want a genuinely charming photo, cut a miniature matching version sized for a cat or small dog. The slightly wobbly cone shape you get from hand-shaping felt is part of the retro look, so don’t stress over getting it perfectly symmetrical. Store it flat between seasons and it will hold its shape for years.
5. Vintage Halloween Ephemera Art
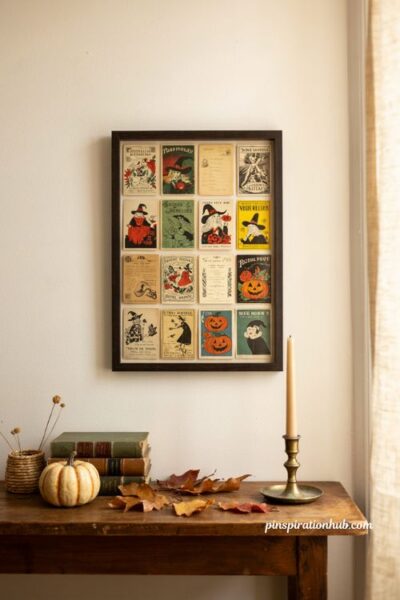
Old Halloween advertisements, postcards, and party invitations have a printed texture that nothing modern quite replicates. Collect a handful of vintage-style Halloween printables, trim them to a matching size, and arrange them in a grid inside a simple black or wood-tone frame. Mixing a couple of different image styles — a witch illustration next to a jack-o’-lantern ad — keeps the collage from feeling too matched. This is one of the lowest-effort projects on the list, since the framing does most of the visual work once you’ve picked images with the right retro color palette.
6. Upcycled Tin Can Halloween Ornaments
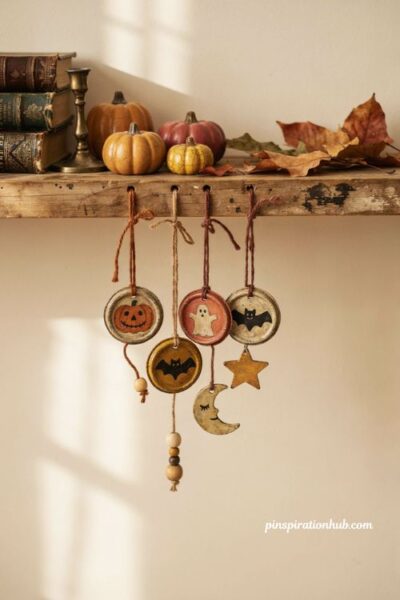
Save a few tin can lids instead of tossing them, sand the edges down thoroughly so they’re safe to handle, and turn them into small hanging ornaments. Thread rustic-colored yarn through a punched hole, add a painted wooden bead or two along the string, and you’ve got a little cluster of retro-look decor for a shelf edge or a mini Halloween tree. The uneven, slightly dented surface of a used tin lid actually helps the retro illusion — a perfectly smooth new tin looks too polished for the look you’re going for.
7. Retro Paper Halloween Candles
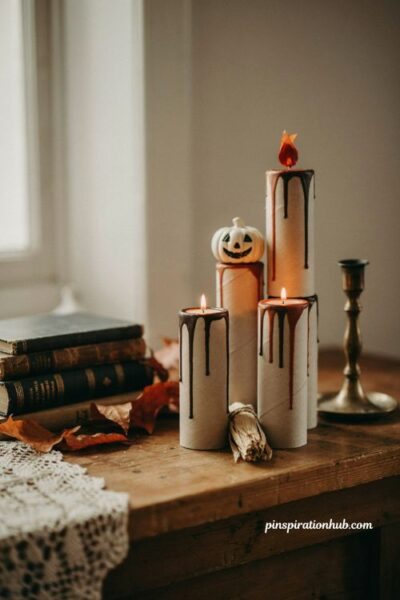
Toilet paper and paper towel rolls become surprisingly convincing candle decorations with the right paint technique. Wrap or paint the tube in a cream or ivory base coat, then add a drip effect down the sides in black or deep orange to mimic old wax candles, finishing with an LED tea light or a paper flame on top. A cluster of three or four at slightly different heights, styled like the black flame candles from classic Halloween movies, makes a far stronger tablescape than a single one on its own. It’s a genuinely satisfying way to use up rolls you’d otherwise recycle.
8. Rustified Jack-o-Lanterns
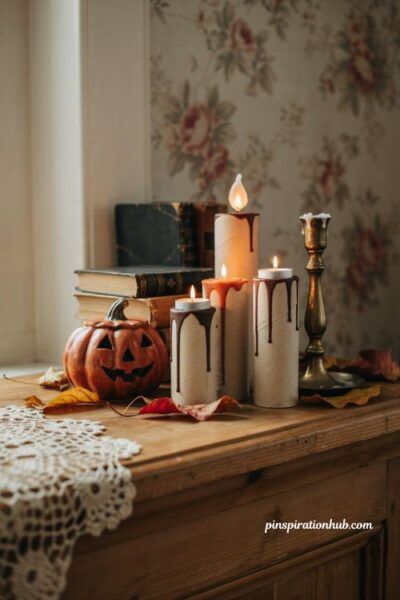
Plastic pumpkin candy buckets from the thrift store are everywhere in October, and a rustifying paint kit turns their flat orange plastic into something that looks like real weathered metal. The transformation is dramatic — the same bucket that looked like a dollar-store toy suddenly reads like an antique tin jack-o’-lantern found at an estate sale. Line a few different sizes along a porch step or mantel for a collected-over-years look, and skip painting the inside if you still want to use one for actual candy on trick-or-treat night.
9. Milk Glass Ghosts
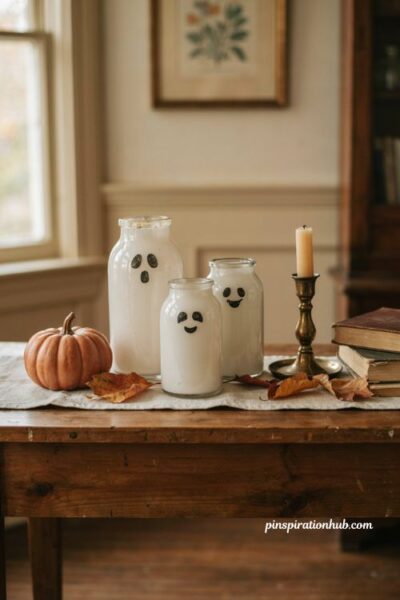
Vintage milk glass vases have a soft, opaque white surface that already looks a little otherworldly before you touch it. A light layer of white face paint or a washable finish turned into simple ghost features — two dark eyes and an open mouth — transforms a thrifted vase into a temporary Halloween ghost you can wipe clean afterward. Because the change isn’t permanent, it’s an easy way to rotate the same vase between seasonal looks without committing to paint that has to be stripped later. Group a few vases of different heights for a small ghostly gathering on a console table.
10. Spooky Moon Lamp
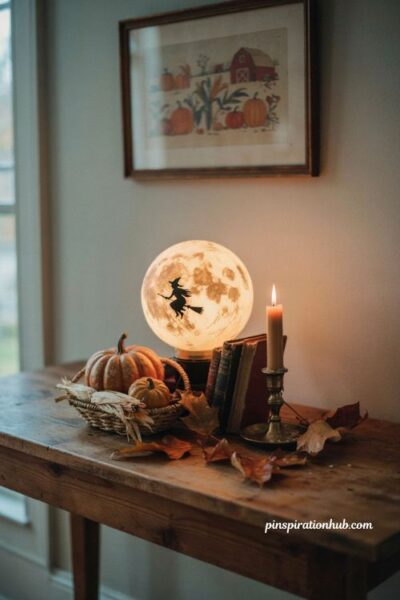
An old light fixture headed for the donation pile can become a genuinely eerie centerpiece with a textured paint technique that mimics a cratered moon surface. Add a small silhouette of a flying witch cut from black paper or vinyl across the front, and the glow from inside does the rest of the work once it’s lit at dusk. This project leans more advanced than most on this list, but the technique for the moon-like texture is simpler than it looks, and the payoff — a lamp that looks pulled from a 1960s Halloween party — is hard to match with anything store-bought.
11. DIY Spell Books
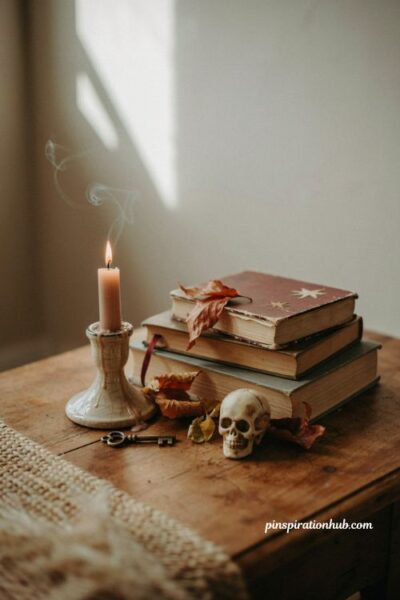
Thrift store bookshelves are full of worn hardcovers just waiting for a second life as spell books. Strip or paint the original cover, add a hand-lettered or printable spell-book-style title, and stack a few together with a candle or a small skull for a witchy vignette. Mixing different book sizes in the stack gives it that “collected from a real study” feel rather than looking like a matched prop set. Leave the aged, slightly worn cover texture alone where you can — it does more for the retro look than any paint technique would.
12. Halloween Junk Journal
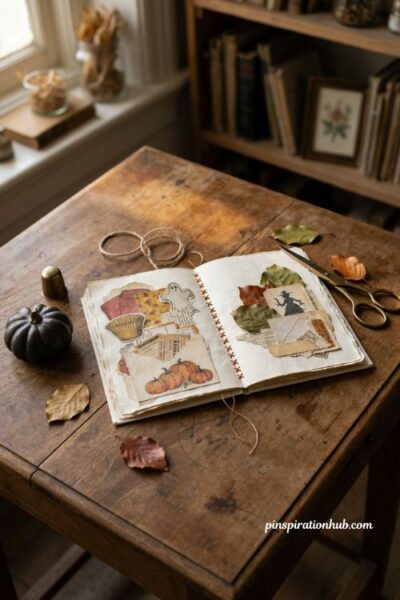
A junk journal built entirely from vintage-style Halloween ephemera — old trick-or-treat bags, cupcake liners, scraps of costume patterns, and vintage ad clippings — turns a stack of paper into a genuinely collectible keepsake. Layer the pieces into a plain notebook or a hand-bound signature, tucking in pockets and folded flaps so each page has something to discover. This one takes longer than most projects here, but it’s also the piece most likely to become a yearly tradition, since you can keep adding pages to it each October instead of finishing it in one sitting.
13. Floating Ghost Decor
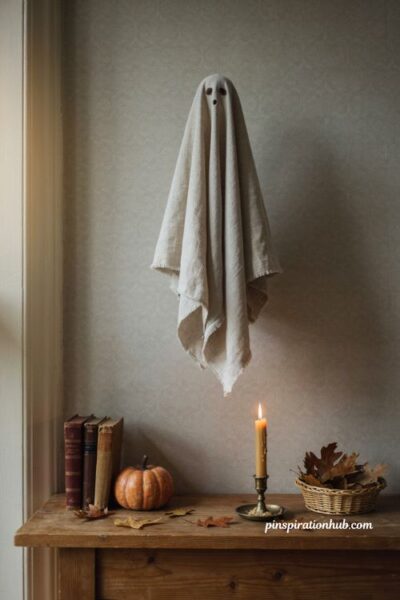
These little ghosts appear to hover with nothing holding them up, and the trick is a hidden support you can usually find secondhand — a wire frame, an old lamp base, or a repurposed stand tucked underneath the draped fabric. Once the fabric ghost is secured to its hidden base, the illusion of floating is immediate and genuinely fools people walking by. Keep the fabric loose and slightly wrinkled rather than pressed smooth, since the movement and texture is what sells the vintage, slightly haunted feel over a stiff, obviously-staged shape.
14. Candy Corn from Thread Spools
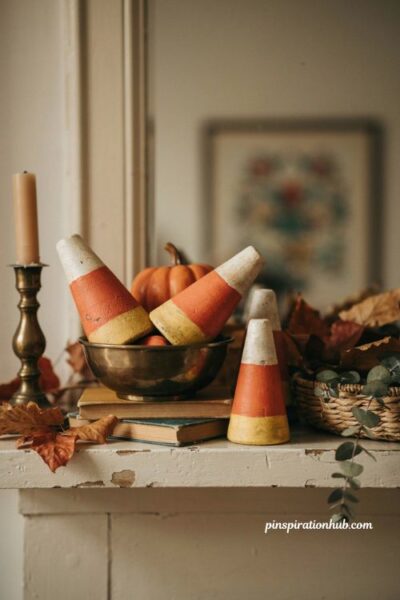
Cone-shaped wooden or cardboard thread spools, the kind you’ll find in the secondhand craft bins at most thrift stores, are shaped almost exactly like candy corn already. A few coats of white, orange, and yellow paint in the right bands turn a boring spool into an oversized decorative candy corn piece. Group five or six together in a bowl or along a mantel for a display that reads as intentional collectible decor rather than a craft project, and the slightly different spool sizes you’ll find secondhand actually help the grouping look more varied and interesting.
15. DIY Potion Bottles
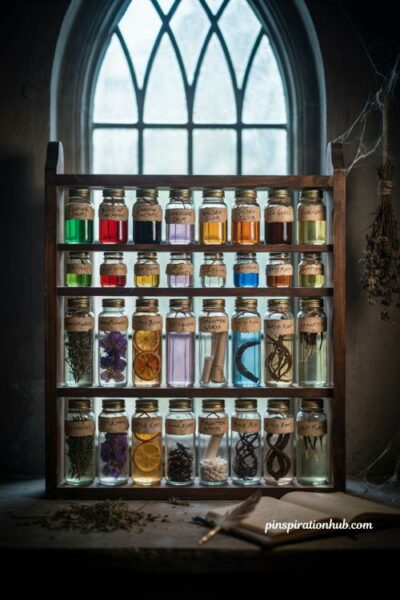
A vintage wooden spice rack, the kind with small glass jars in matching rows, makes an almost too-perfect base for a mad scientist’s shelf of potion bottles. Fill each jar with colored water, dried herbs, or small props, then label them with handwritten or printable apothecary-style tags for the final touch. The uniform bottle shapes paired with mismatched, slightly aged-looking labels give the whole set a collected-over-time feel rather than a matched party-store set. Display the full rack on a shelf or windowsill where the colors catch the light for the most dramatic effect after dark.
Final Thoughts
None of these projects require special tools or a big craft budget — most of what you need is probably already sitting in a donation pile or a thrift store bin waiting to be noticed. Start with whichever one uses materials you already have on hand, whether that’s an old sheet, a spice rack, or a stack of tin lids, and let the rest build up over a few seasons rather than trying to do all fifteen at once. The best part of decor like this is that it only gets better with age — a felt garland you made ten years ago will always mean more than something bought last week. Have fun digging through those bins.
Frequently Asked Questions
Q: How do I make Halloween decor look genuinely vintage instead of just handmade? Lean on slightly imperfect, hand-cut edges, aged or worn materials like old fabric and secondhand books, and muted color palettes rather than bright new paint straight from the store.
Q: What thrift store items work best for DIY vintage Halloween decor? Old hardcover books, milk glass vases, tin lids, wooden spools, spice racks, and light fixtures are all easy to find secondhand and transform well.
Q: Is DIY vintage Halloween decor cheaper than buying real antiques? Yes — most of these projects use thrifted or upcycled materials that cost only a few dollars, compared to genuine vintage collectibles that can sell for much more at flea markets or online.