
There’s something about the first cool morning in autumn that makes your hands itch to make something. Maybe it’s the smell of dried leaves, or the way the light turns gold by four in the afternoon, but fall has always been the season for slow, hands-on projects. You don’t need a workshop full of tools or a weekend cleared out.Most of these ideas come together with things you probably already have in a drawer or a craft box, and none of them ask for a steady hand or years of practice. Here are fifteen fall crafts for adults that are worth clearing an afternoon for.
1. Mod Podge Painted Pumpkins
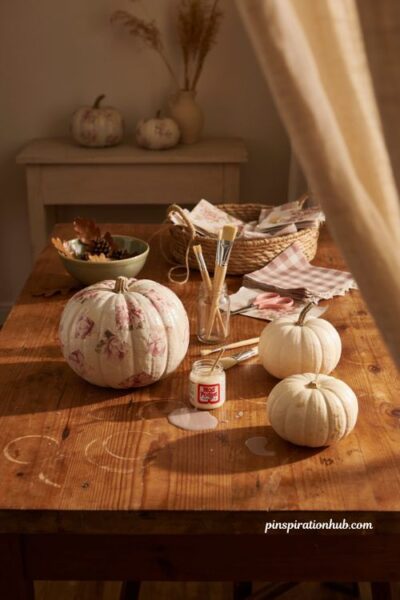
Start with a plain white pumpkin, real or faux, and a bottle of Mod Podge. Instead of paint alone, tear a paper napkin with a pattern you like and smooth it over the surface in sections, sealing each piece down as you go. The trick is working slowly so the paper doesn’t wrinkle or tear near the stem. Because there’s no carving involved, these hold up for the entire season and can be tucked away and brought back out next year. Try mixing a floral napkin with a plain gingham one on a cluster of three pumpkins for a layered, collected look on a mantel or entry table.
2. Lace-Wrapped Pumpkin
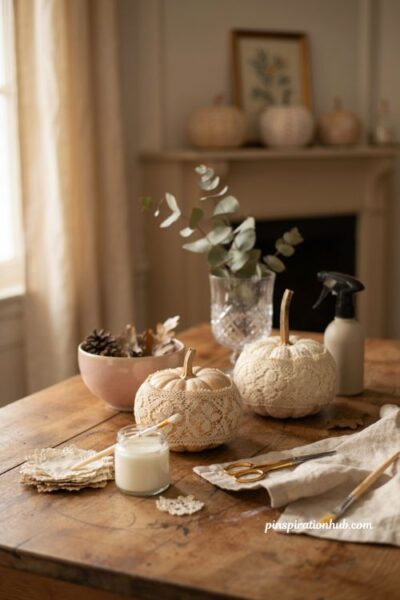
For something a little softer than paint, smooth a lace doily over a small pumpkin and seal it in place with Mod Podge, letting the open pattern show the color underneath. This one works best on a light-colored pumpkin so the lace detail actually reads from across the room. It’s a quiet, dressed-up project that suits a formal mantel better than a bold painted one. Once it’s dry, a light layer of matte spray sealer will keep the lace from lifting at the edges if you plan to display it outdoors.
3. Mini Pumpkin Flower Vases
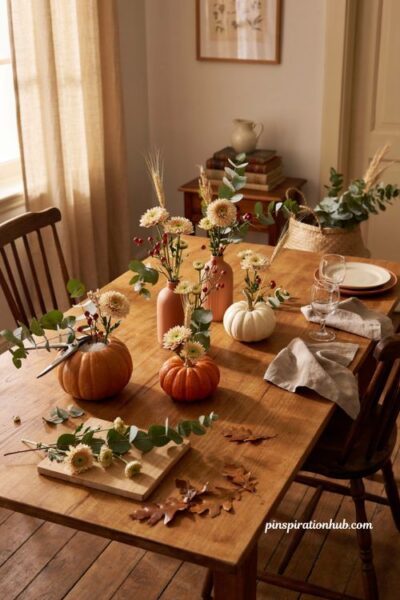
Hollow out a few mini pumpkins and use them as little vases for mums, greenery, and berry stems instead of a traditional vase. A short floral foam disc tucked inside the hollowed pumpkin keeps the stems upright and makes arranging much easier. Group three or four together down the center of a table for an instant centerpiece, or set one at each place setting for a fall dinner. Swap the mums for dried wheat or eucalyptus if you want the arrangement to last well past the first frost.
4. Neutral Grapevine Wreath
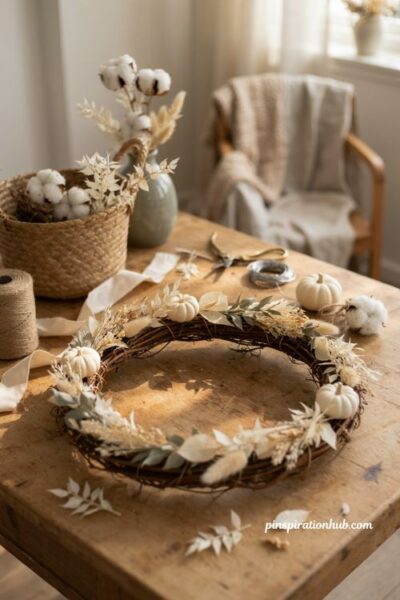
A grapevine wreath form is the easiest base to build on, and this one stays soft and neutral with ivory leaves, small white pumpkins, and a few cotton stems wired on at intervals. Working in odd-numbered clusters rather than spacing everything evenly gives the wreath a more natural, gathered look. Because the palette is so muted, it works on almost any front door color and can stay up well past Halloween into the Thanksgiving weeks. Floral wire hidden behind the vines keeps everything secure without any visible glue.
5. Dried Hydrangea Wreath
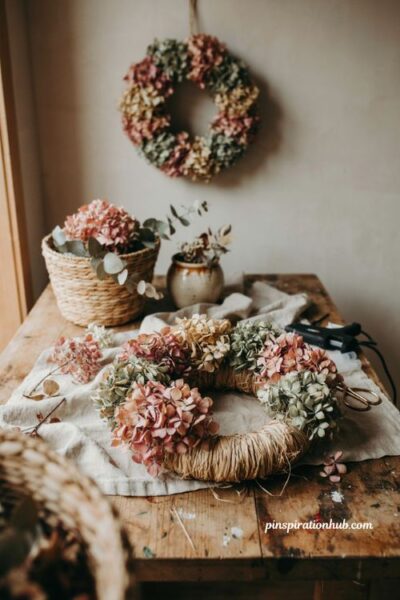
Tuck dried hydrangea blooms into a straw wreath form, working in small sections until the whole shape looks full and rounded rather than patchy. The faded green and dusty pink tones that dried hydrangeas take on read as far more natural than anything fresh or bright, and unlike a live-flower wreath, this one will easily last the whole season without wilting. Hot glue at the base of each stem, pushed directly into the straw, holds better than wire here. Hang it somewhere protected from direct sun so the color doesn’t bleach out too quickly.
6. Stained Dried Gourd Display
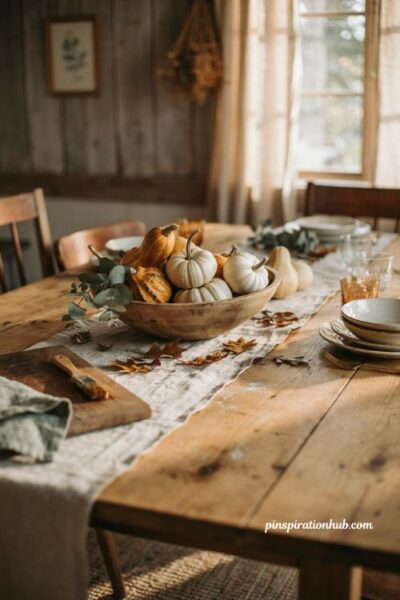
A light wood stain rubbed onto dried gourds gives them a warm, aged look that pairs beautifully with greenery. Once they’re dry, group them in a wooden dough bowl alongside a few small white pumpkins and loose sprigs of greenery for an easy centerpiece. The uneven, natural shapes of the gourds do most of the visual work, so you don’t need to overthink the arrangement. This one looks especially good left out through Thanksgiving, since the neutral tones fit right into a harvest table.
7. Fall Woodland Frame
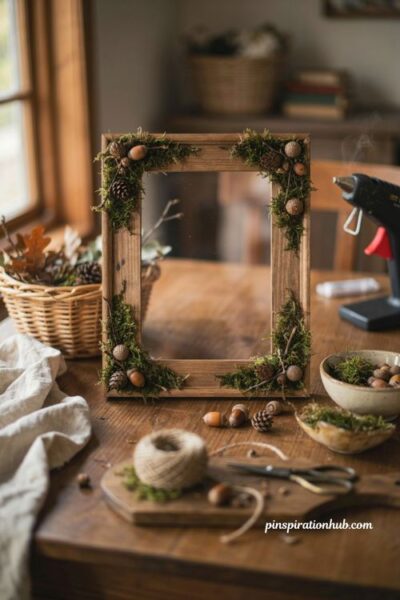
Take a plain wooden picture frame and edge it with a thin layer of moss glued around the border, then add small acorns, pinecones, and twigs on top. This is the perfect project for anything you gather on a fall walk, since even a small handful of finds is usually enough to fill a standard-sized frame. Leave the center open for a mirror, a chalkboard insert, or a favorite fall photo. A hot glue gun works better than craft glue here, since it grips the moss and acorn caps without sliding before it sets.
8. Burlap Bouquet Favors
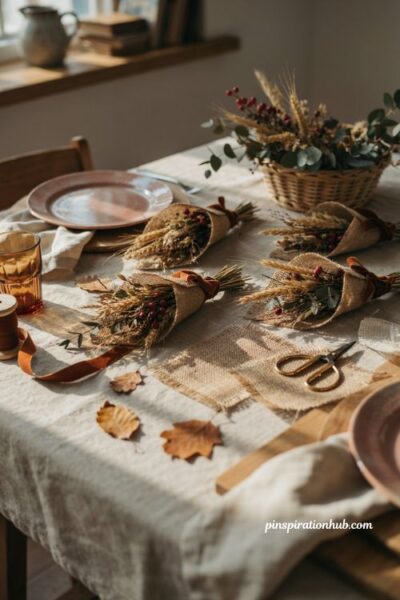
Lay a few stems — dried wheat, eucalyptus, or berry sprigs all work well — diagonally across a square of burlap turned so one corner points up toward you. Fold the bottom point over the stems first, then bring in the two side corners and tuck the raw edges under as you roll, so the whole bundle stays neat and doesn’t fray. Finish with a length of brown ribbon tied around the middle and a simple bow. These make lovely party favors set at each place, or a quick handmade gift for a neighbor. No burlap on hand? A plain cloth napkin or an old handkerchief works just as well.
9. Marigold Cord Garland
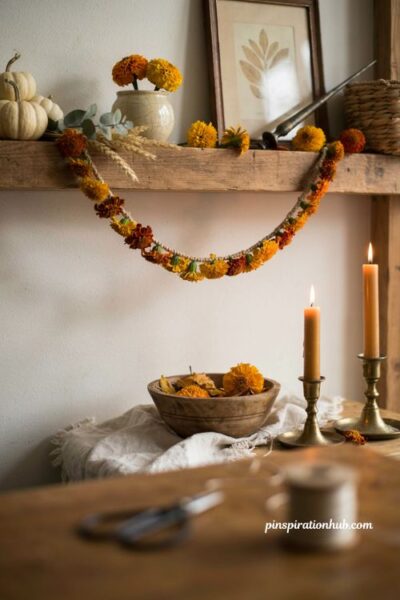
Cut marigold heads from their stems, then thread a piece of cording straight through the center of each flower using a large needle, pushing the blooms close together as you go. Keep threading until the garland reaches whatever length you need, then knot both ends securely so the flowers don’t slide off. It looks far more expensive than it actually costs to make, and it drapes beautifully across a mantel, a mirror, or the back of a dining chair. Let it dry naturally after hanging for a slightly faded, pressed-flower look that lasts even longer.
10. Mini Pumpkin Candleholders
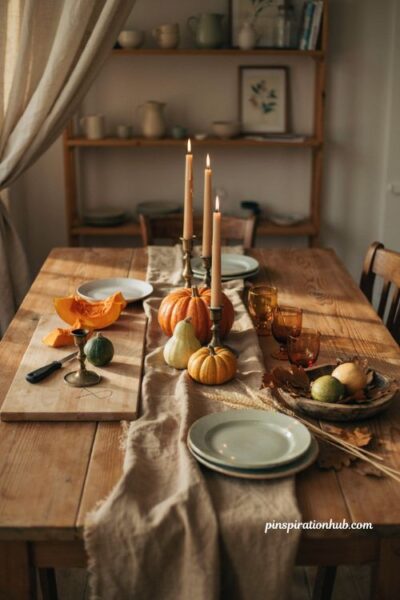
Trace the base of a metal candlestick holder onto the top of a small pumpkin or gourd, then use a sharp craft knife to cut out the shape and hollow out enough flesh so the holder fits snugly inside. Once it’s seated, drop your candle into the holder rather than directly into the pumpkin, which keeps the flame safely away from the flesh. A cluster of three at different heights makes a striking centerpiece down the middle of a table. Stick to gourds with a flat top for the cleanest, most stable cut.
11. Velvet Fabric Mushrooms
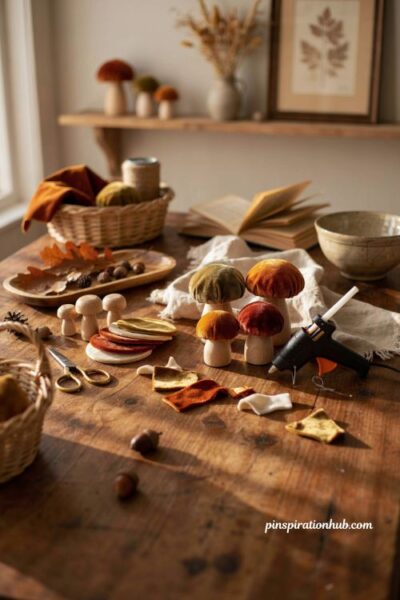
Start with a small wooden mushroom base, the kind sold plain at most craft stores, and cut circles of velvet fabric slightly larger than the cap. Apply hot glue to the underside of the wooden cap and pull the velvet taut as you press it down, working around the edges so there are no loose puckers. A cluster of these in warm rust, olive, and cream velvet scattered across a mantel or bookshelf adds an unexpected, almost woodland touch to fall decor. They’re small enough to make a whole batch in one sitting while you watch a movie.
12. Pressed Fall Leaf Placemats
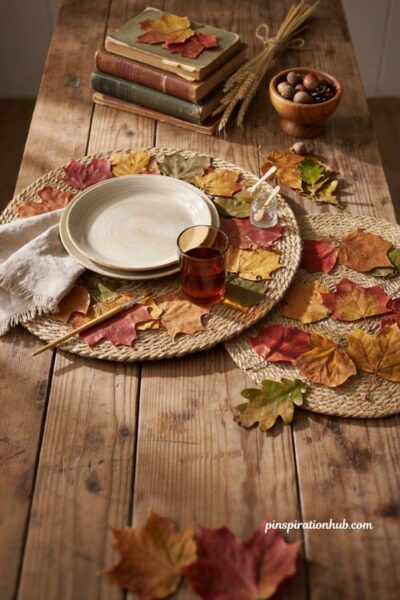
Collect and press a handful of colorful leaves from outside, flattening them under a stack of heavy books for a day or two before you start. Once they’re flat, arrange them on a plain woven placemat and secure them with a clear craft adhesive, then brush a thin protective coat directly over the top of the leaves once they’re set. This keeps the leaves from crumbling with everyday use and gives the whole placemat a slight shine. Artificial leaves work here too if you want something more durable for a table that gets a lot of use.
13. Cornhusk Flower Bouquet
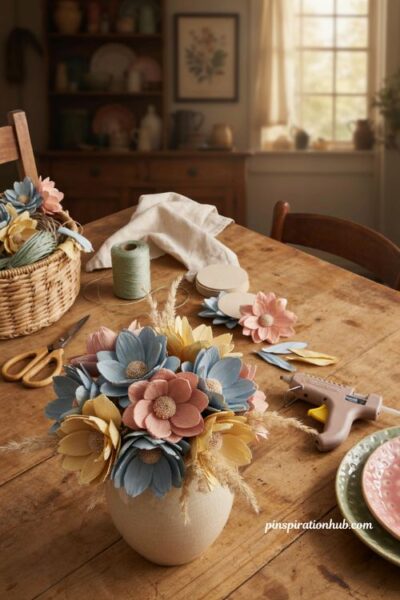
Cut dyed cornhusks into rounded petal shapes and hot-glue them in layers onto a small cardstock circle with a hole punched through the center. Once the petals are arranged, twist a length of floral wire and thread it through the hole to form a stem, then glue a small pom-pom over the center to finish the flower’s middle. A bouquet of these in soft blues, blush, and butter yellow looks nothing like typical fall orange and adds real color variety to a tablescape. They hold their shape indefinitely, so the arrangement can be reused year after year.
14. Upcycled Sweater Pumpkins
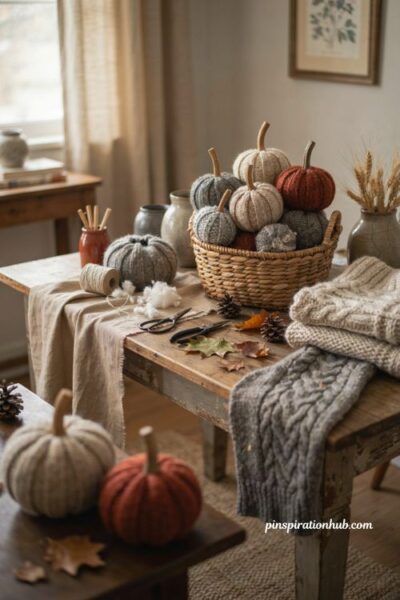
Cut the sleeve off an old cable-knit sweater you no longer wear, then stuff it with fiberfill or plastic bags and cinch the open end closed with a rubber band or string. Fold the fabric under at the base so it sits flat, and press a wooden dowel or stick into the top as a stem, gluing it in place if needed. Set several in a basket by the door or scattered across a coffee table for the coziest texture of the whole season. This is also a good way to give a moth-eaten or stretched-out sweater one more use before it’s donated.
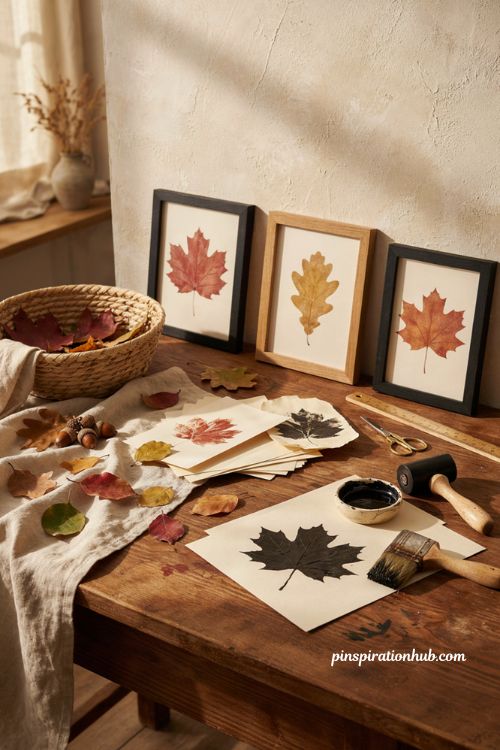
15. Fall Leaf Ink Prints
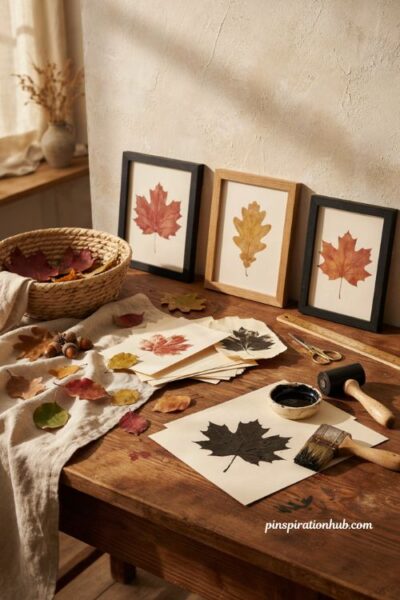
Coat the underside of a fresh fall leaf with a thin, even layer of craft or block-printing ink using a small foam brush, then press it ink-side down onto a piece of heavy cardstock or watercolor paper. Smooth over the back gently with your hand or a clean brayer before peeling the leaf away to reveal the print. Maple and oak leaves tend to give the clearest veining, so it’s worth testing a few shapes before committing to your final paper. Framed in a simple black or wood frame, a set of three prints makes an easy, gallery-style piece of fall art.
Final Thoughts
If you only try one of these, let it be whichever one you found yourself rereading. That’s usually a sign it’s the project you’ll actually finish instead of the one that sits half-done in a craft bin until spring. Clear an hour this weekend, put on something good to listen to, and start with whatever’s already sitting in your house — a leaf collection from a walk, a sweater you were about to donate, a jar of ribbon. Fall crafting doesn’t need to be complicated to feel worth the time.
Frequently Asked Questions
Q: What fall craft is easiest for a total beginner?
Mod Podge painted pumpkins and burlap bouquet favors are the most forgiving, since there’s no cutting or precise technique involved.
Q: How long do dried flower and gourd crafts actually last?
Dried hydrangea wreaths and stained gourds typically hold their look for the entire fall season and often into winter if kept out of direct sunlight.
Q: Can I make these fall crafts without buying real pumpkins?
Yes — faux craft-store pumpkins and gourds work for nearly every project here, including the Mod Podge, lace, and candleholder ideas, and they can be reused year after year.